The Iron Mountains
The Iron Mountains (also known as the Gloomy Island) is a location in Rayman 2 and its remakes. It is where the fourth and final mask of Polokus is found, though it is not necessarily a sanctuary.
Original version
| The Iron Mountains | ||
|---|---|---|

| ||
| ← Tomb of the Ancients | The Prison Ship → | |
This level is set high up in the mountainous regions of the Glade of Dreams, where a number of pirate strongholds are built. Deep in the canyons nearby are mines in which a large number of baby Globoxes are held captive. Many Robo-Pirates patrol the area.
-
 In this version, the Iron Mountains level has no hologram in the Hall of Doors. The dark tunnel in the background leads directly to the Buccaneer levels.

Phase 1 – The Gloomy Island
Rayman is outside a metalworks building with a generator room inside, and he has to shoot two switches to deactivate an electric field and go down the middle of a rotating machine and into a pipe that leads to a grassy area. Going though another tunnel past a swampy lake, there is another pirate stronghold which is notable in the Dreamcast version of the game for featuring the only switch which can be turned on and off with Rayman's magic fist, rather than just on once. Once at the top of the stronghold, Rayman has to jump off and glide down a rapid river. At the edge is a hot air balloon which he hops in and rides.
Phase 2 – The Reformatory for Disturbing Children
He then lands in a field with yet another stronghold, which is this time guarded by the invincible giant Robot Dinosaur, despatched by the Robo-Pirates to find the fourth mask before Rayman does. The Robot Dinosaur is so heavy, every time it jumps it sends objects bouncing up into the air. Rayman can make use of these objects to infiltrate the stronghold (the Reformatory for Disturbing Children), where a few baby Globoxes are being held captive. Rayman soon finds a walking shell and has to ride about the outside of the Reformatory to collect some Yellow Lums and find two switches (three switches in the PlayStation version) to release the babies.
Phase 3 – The Pirate Mines
Deep in a canyon, Rayman has to cross a polluted pond, and he will eventually meet Uglette, Globox's wife, who is extremely sad by the fact that more of her babies are missing and held in the mines. The player then takes control of a pirate warship and has to manoeuver it through the canyons and find the four mines, collecting many baby Globoxes from each one. When all of the mines are visited, Rayman has to bring the warship back to Uglette to reunite her with her babies. One of them withdraws the fourth mask from its mouth and tells Rayman that he found it in the Mines. He then gives the mask to Rayman, who is transported to Polokus.
-
 Concept art

Trivia
- During the shell ride, a glitch allows Rayman to jump outside the Reformatory for Disturbing Children without activating the switches and saving the babies.
Dreamcast version
| The Iron Mountains | ||
|---|---|---|

| ||
| ← Tomb of the Ancients | The Prison Ship → | |
This level is nearly identical to the original version, with the following differences:
- At the neat end of phase 1, before the hot air balloon, a Glob Crystal is found – this is the last of the six to collect.
- The first pirate in the swampy area has been moved back, shoots helicopter bombs and drills through the ground. Also, two pirates have been added near the start of the Pirate Mines.
- Piranhas added: 2 in the bridge in the beginning of the level and one in the swampy area where the two pirates are fought.
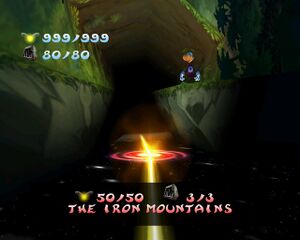
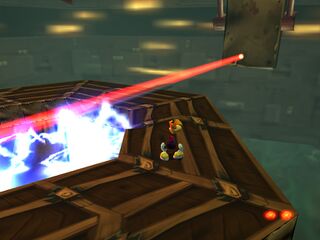
- Graphical changes in the generator room with the two switches, some structures changed, the pool of polluted water and ceiling is replaced with a floor and caged ceiling with a slow, circular, ominous red laser, same thing is given with the middle stalactite-like structure. The outside of the building is also foggier and the polluted water is changed to plain green (however, both of these were reverted in the 3DS version.)
- One change was made to the 3DS version: in phase 3, the plum used to reach a large Yellow Lum was removed, and the Lum now homes into Rayman, making it much easier to collect.
-
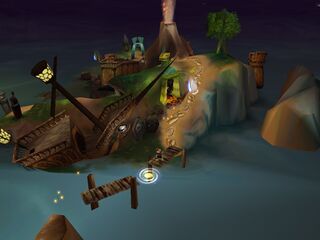 The Spiral Door in the Isle of Doors which leads to the Iron Mountains.
 -
 The tower leading to the dam is slightly redesigned.
 -
 The platform which the Henchman 800 stands upon now spans the whole width of the rapids. (This change was reverted in the 3DS version.)
.jpg)


PlayStation version
| Gloomy Island | |||
|---|---|---|---|

| |||
| ← Tomb of the Ancients | The Prison Ship → | ||
In this version, the level is called the Gloomy Island, and the third phase has been completely removed. At the beginning, Rayman sees Uglette, and she tells him that her babies were taken to the pirate stronghold. Rayman has to locate it and rescue them.
Phase 1 of the level is used in part, but is heavily edited in some areas. As said above, Uglette informs Rayman of the children's capture at the very start of the level, not towards the end. This gives Rayman more purpose to being here in this version, rather than seemingly wandering randomly as in other versions.
There is a bizarre inconsistency here not present in other versions due to the Uglette cutscene occurring at the very start of the level. When the player enters the level from the Hall of Doors, the game will load, then jump straight into the cutscene with Uglette, which shows Rayman already in the level, comforting Uglette. However, after the cutscene, Rayman emerges from the Spiral Door as usual, and lands next to a weeping Uglette.
-
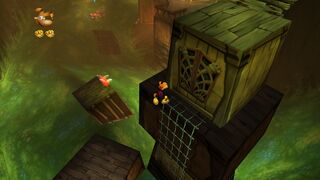
 A Ninja Henchman attacking Rayman.

PlayStation 2 version
| The Iron Mountains | |
|---|---|

| |
| ← Tomb of the Ancients | The Prison Ship → |
This level remains the same, but with the following exceptions:
- The Gorilla Pirate inside the Reformatory for Disturbing Children has been replaced with a pair of Henchmen 800.
- While riding the shell next to the Robot Dinosaur, the camera changes to an overhead view, making it easier to direct the robot and collect the Yellow Lums.
- Phase 3 in which Rayman commandeers a warship to rescue the baby Globoxes has been omitted from this level, and is used as its own level called the Pirate Mines. Instead of the fourth mask, a baby Globox rewards Rayman with the Rain Mask instead.
- Because of this, there is a new Guardian called Grolem 13, who guards the fourth mask. He is fought in a new phase added to the end of the Iron Mountains, which takes the place of the Pirate Mines phase.
- An extra minigame known as the Schplong is featured in this level. To access it, the player must press the square or the circle button 15 times whilst on the hot air balloon.
-
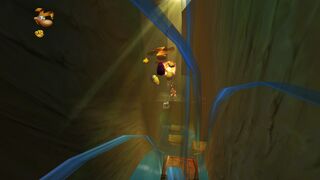
 The rotating machine in Rayman Revolution.

External links
- The Iron Mountains playthrough at YouTube (PC version) (Part 1/3)
- The Iron Mountains playthrough at YouTube (PC version) (Part 2/3)
- The Iron Mountains playthrough at YouTube (PC version) (Part 3/3)
- The Iron Mountains playthrough at YouTube (Sega Dreamcast version) (Part 1/3)
- The Iron Mountains playthrough at YouTube (Sega Dreamcast version) (Part 2/3)
- The Iron Mountains playthrough at YouTube (Sega Dreamcast version) (Part 3/3)
- The Gloomy Island playthrough at YouTube (Sony PlayStation version)
- The Iron Mountains playthrough at YouTube (Sony PlayStation 2 version) (Part 1/3)
- The Iron Mountains playthrough at YouTube (Sony PlayStation 2 version) (Part 2/3)
- The Iron Mountains playthrough at YouTube (Sony PlayStation 2 version) (Part 3/3)
