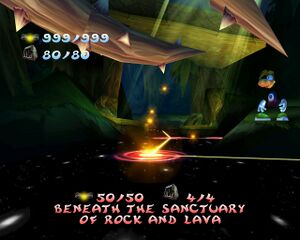
Beneath the Sanctuary of Rock and Lava
Well, I say that you are a thief! A thief and a liar, to boot! Prepare to die!—Foutch, Rayman 2 (PlayStation version)
Beneath the Sanctuary of Rock and Lava is a level in Rayman 2. It is a continuation of the previous level, the Sanctuary of Rock and Lava as it is set inside the same temple, and it is where the third of Polokus' masks is hidden. It is also the only levels in the game in which Rayman can use his helicopter to fly, except for in Rayman Revolution. In Rayman Revolution, it is known as Beneath the Lava Sanctuary or Beneath the Sanctuary of Lava.
After defeating Foutch and taking the Third Mask, phase 3 is no longer accessible. The Spiral Door that serves as the exit of the level will be placed on to the door that would previously lead to phase 3. The only exception is the PlayStation version, where it is possible to fight Foutch again.
Beneath the Sanctuary of Rock and Lava was originally called "Beneath the Sanctuary of Earth and Stone", and Umber was meant to be its guardian.[1]
Original version
| Beneath the Sanctuary of Rock and Lava | ||
|---|---|---|

| ||
| ← The Sanctuary of Rock and Lava | Tomb of the Ancients → | |
Phase 1
Rayman falls out of a Teensie portal from the ceiling into a room beneath the Sanctuary of Rock and Lava. He looks around the room, only to find that before him is a pit of lava, while above, there is a tunnel of nettles - either way, he is trapped. Rayman remains stumped, until Ly the Fairy appears to deliver good news and bad news. The good news is that she has gathered enough energy to create a Silver Lum, which gives him the power to fly with his helicopter. The bad news is that his mission will be much harder. Finally, Ly whisks herself away, leaving Rayman to try out his new power.
Underneath the spot Rayman is standing on, is a corridor with a cage at the end. Then Rayman will fly through the tunnel of thorns, shooting any nettles and baby caterpillars that come in his way. Eventually, he will reach a safe spot to stand on, and to his left there is a giant fan. If he jumps and activates the super helicopter, he will be blown away through more thorny tunnels, as well as having to dodge stone flame throwers. These thorny corridors and pits of lava will carry on, until he enters a room with falls of yellow lava, which is even more deadlier to come to contact with. He will eventually arrive on safe ground again, and come across a stone coming from the ceiling with a slanted side. The trick is to shoot this side to rebound shots that will break the stone that is blocking the hole on the ground, which he will finally descend.
-
 The entrance to beneath the Sanctuary of Rock and Lava in the Hall of Doors.

Phase 2
Rayman comes across another fan which will blow him down a corridor with a river of lava, dodging yellow lava falls and then thorny thickets that try to block the passage. Eventually, there is a large opening on the walls of the nettles, in which two cages are found. Then he will continue flying down the corridor, shooting away some nettles until he reaches a breakable stone door, which somehow opens up for him, but then shuts. Looking around for what to do next in this new room, Foutch, the Guardian of the Sanctuary of Rock and Lava, creeps up on him from behind and delivers a forceful blow that sends the limbless hero down a pit of yellow lava.
Phase 3
Main article: Foutch
Still falling to the ground, Rayman realises that the blow had been so powerful that he cannot fly anymore, and the battle with Foutch begins. Rayman will have to run around the room, avoiding Foutch's columns and rows of fire, while using cobwebs to bounce up and shoot a stalactite from the ceiling to inflict damage. Once Foutch is defeated, a Purple Lum will be released, and used to reach higher ground, which finally leads to the Third Mask.
Dreamcast version
| Beneath the Sanctuary of Rock and Lava | ||
|---|---|---|

| ||
| ← The Sanctuary of Rock and Lava | Tomb of the Ancients → | |
This level is identical to that of the original version, except that it features Robo-Pirates, which is the case for none of the other versions.
-
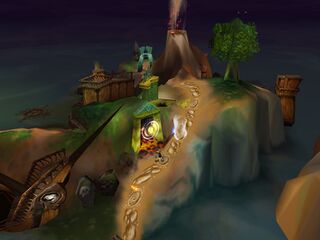 The Spiral Door in the Isle of Doors which leads beneath the Sanctuary of Rock and Lava.

PlayStation version
| Beneath the Sanctuary of Rock and Lava | |||
|---|---|---|---|

| |||
| ← The Sanctuary of Rock and Lava | Tomb of the Ancients → | ||
This level bears much resemblance to that of the original version but with the following differences:
- Under the ledge which Rayman drops on, there are Yellow Lums, and the hidden room with the cage is now on the other side of the pit. The row of Red Lums on the other ledge is replaced with a Yellow Lum.
- Along the way in the thorny corridor in phase 1, there is a cage hanging on the wall.
- The fourth and final cage is found under a log of thorns along the lava corridor in phase 2, and the opening before Foutch's room is omitted.
- Before the battle with Foutch begins, the Guardian accuses Rayman of being the mask thief, as well as being a liar when the limbless hero explains that he needs the masks to rid the world of the Robo-Pirates.
- The third mask has been moved on top of the high ground which can be reached with the Purple Lum.
- As noted above, Foutch must be battled again when Rayman revisits the level, so phase 3 does not become inaccessible after obtaining the mask.
-
 Nettles symbolise the level in the Hall of Doors.

PlayStation 2 version
| The Lava Sanctuary | |
|---|---|

| |
| ← Beneath the Lava Sanctuary | Tomb of the Ancients → |
While much of this level remains the same as that of the original; one difference is that rather than losing the super helicopter power completely, Rayman partially recovers it after the battle with Foutch so that he can still fly in the rising hot air emanating from bodies of lava.
The cutscene introducing Foutch appears to have not been updated from the original versions of Rayman 2: it still labels Foutch as "Guardian of the Sanctuary of Rock and Lava", even though the level itself is referred to in the game as "The Lava Sanctuary".
In the Rainbow Creek, the names of the Lava Sanctuary and beneath the Lava Sanctuary have been inverted on the Spiral Doors of the Teensie Circle and on the road signs, for unknown reasons.
Trivia
The presence of the super helicopter power in Beneath the Sanctuary of Rock and Lava creates a number of inconsistencies surrounding it. Whilst understandable from a gameplay perspective (the designers did not want Rayman to be able to use his super helicopter in levels other than this one to avoid him going outside the map or reaching areas he was never meant to see, and Beneath the Sanctuary of Rock of Lava had to be replayable) they are harder to explain in-universe:
- If Rayman leaves Beneath the Sanctuary of Rock and Lava through the Spiral Door at the start of the level, he will not have his super helicopter power in any other level he visits, despite not having lost it yet since he has not faced Foutch.
- On replays of Beneath the Sanctuary of Rock and Lava, the cutscene of Ly giving Rayman his new power will play again, explaining how he got it back. However, as Foutch (and, more crucially, the cutscene featuring him) does not appear on subsequent playthroughs, it is never explained how Rayman lost the power again.
- This problem is reversed in the PlayStation version, as the cutscene with Ly does not play upon returning to the level, but the one with Foutch does, meaning that it is explained how Rayman lost his super helicopter power again, but not how he got it back in the first place.
- Rayman Revolution attempts to remedy these issues somewhat, by showing Rayman partially regain his super helicopter power after retrieving the third mask, in that he can now use it only when hovering over lava. This allows him to use the power in any level that features lava from there on in. However, this does not explain why Rayman initially loses the power if he leaves Beneath the Sanctuary of Rock and Lava before fighting Foutch, nor how he gets it back if he revisits Beneath the Sanctuary of Rock and Lava before going to Skull Cave, where he receives the power back, according to the story. Also, when replaying Beneath the Sanctuary of Rock and Lava, Rayman is able to use his super helicopter above ground, despite the fact that this should not be possible at this point in the story.
External links
- Beneath the Sanctuary of Rock and Lava playthrough at YouTube (PC version) (Part 1/2)
- Beneath the Sanctuary of Rock and Lava playthrough at YouTube (PC version) (Part 2/2)
- Beneath the Sanctuary of Rock and Lava playthrough at YouTube (Sega Dreamcast version) (Part 1/2)
- Beneath the Sanctuary of Rock and Lava playthrough at YouTube (Sega Dreamcast version) (Part 2/2)
- Beneath the Sanctuary of Rock and Lava playthrough at YouTube (Sony PlayStation version)
- The Lava Sanctuary playthrough at YouTube (Sony PlayStation 2 version) (Part 1/2)
- The Lava Sanctuary playthrough at YouTube (Sony PlayStation 2 version) (Part 2/2)
References
- ↑ This information comes from the lines "The Sanctuary of Rock and Stone", "The Sanctuary of Earth and Stone" and "UMBER: Guardian of the sanctuary of rock and stone" in early demos of the game.
