Hoodlum Moor: Difference between revisions
Jump to navigation
Jump to search
Added information |
mNo edit summary |
||
| Line 25: | Line 25: | ||
File:RHR 79.png|[[Murfy]] giving information about the [[Heavy Metal Fist]] can. | File:RHR 79.png|[[Murfy]] giving information about the [[Heavy Metal Fist]] can. | ||
File:RHR 80.png|This gate can be broken by the [[Heavy Metal Fist]]. | File:RHR 80.png|This gate can be broken by the [[Heavy Metal Fist]]. | ||
File:RHR 81.png|[[Rayman]] and [[Globox]] meeting near the exit. | File:RHR 81.png|[[Rayman]] and [[Globox]] meeting near the exit. | ||
</gallery> | </gallery> | ||
Revision as of 21:40, 12 March 2017
| Hoodlum Moor | |
|---|---|
 | |
| ← Begoniax Bayou | Land of the Livid Dead → |
    
| |
|
| |
|
| |
     
|
 
|
The Hoodlum Moor is the ninth level in Rayman: Hoodlums' Revenge. The player must alternatively control Rayman and Globox, each triggering switches that open new paths for the other.
Description
As the evil spirit of André continues to corrupt Globox, Rayman begins to be suspicious of his unusual statements. Nonetheless, the two continue on through the murky swamps, alternating to access paths. The paths are be blocked by gates, which will require the alternating between characters to reach the switches that will open the gates. During the middle part, Rayman will have to use the Heavy Metal Fist to break open doors when no switches are around. Rayman will eventually use the boat to meet up with Globox at the end of the level.
Screenshots
-
 Murfy telling the player how to alternate between the two characters.
 -
 Many gates like this one can be opened through activating a switch.
 -
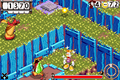 Some enemies like these Hoodbooms will need to be destroyed to open certain gates.
 -
 There needs to be a way to change the current to allow the boat to move.
 -
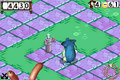 Switches are useful for continuing.
 -
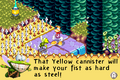 Murfy giving information about the Heavy Metal Fist can.
 -
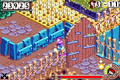 This gate can be broken by the Heavy Metal Fist.
 -



External links
- Hoodlum Moor playthrough at YouTube (Part 1/4)
- Hoodlum Moor playthrough at YouTube (Part 2/4)
- Hoodlum Moor playthrough at YouTube (Part 3/4)
- Hoodlum Moor playthrough at YouTube (Part 4/4)