Fairy Council (Rayman: Hoodlums' Revenge): Difference between revisions
Hunchman801 (talk | contribs) No edit summary |
Hunchman801 (talk | contribs) m clean up |
||
| Line 1: | Line 1: | ||
{{ | {{RHRLevel | ||
| name = The Fairy Council | | name = The Fairy Council | ||
| image = [[File:RHRFairyCouncil.png|center|class=sprite| | | image = [[File:RHRFairyCouncil.png|center|class=sprite|The Fairy Council]] | ||
| preceded by = Introduction scene | | preceded by = Introduction scene | ||
| followed by = [[Clearleaf Forest (Rayman: Hoodlums' Revenge)|Clearleaf Forest]] | | followed by = [[Clearleaf Forest (Rayman: Hoodlums' Revenge)|Clearleaf Forest]] | ||
| Line 17: | Line 17: | ||
==Description== | ==Description== | ||
[[File:Podocrock RHR.png|frame|left|class=sprite|A [[podocrock]] attacking [[Rayman]].]] | [[File:Podocrock RHR.png|frame|left|class=sprite|A [[podocrock]] attacking [[Rayman]].]] | ||
Similar to the level of the same name in ''[[Rayman 3: Hoodlum Havoc|Rayman 3]]'', this level is set in a place in which the grass is purple in colour. Much of the land is surrounded by golden railings and lampposts. However, large bodies of pink water surround the area as well as its many small islands, which [[Murfy]] describes as not looking "healthy", assuming that it has been poisoned. [[Rayman]] therefore cannot step in the water (and all other bodies of water and sharp obstacles in the game for that matter) for too long otherwise his health will quickly deteriorate to the point of game over. | Similar to the level of the same name in ''[[Rayman 3: Hoodlum Havoc|Rayman 3]]'', this level is set in a place in which the grass is purple in colour. Much of the land is surrounded by golden railings and lampposts. However, large bodies of pink water surround the area as well as its many small islands, which [[Murfy]] describes as not looking "healthy", assuming that it has been poisoned. [[Rayman]] therefore cannot step in the water (and all other bodies of water and sharp obstacles in the game for that matter) for too long otherwise his health will quickly deteriorate to the point of game over. At the end of the level, there is a gate that has to be opened upon hitting a switch. | ||
Neither [[Fairy|fairies]] or [[the Fairy Council]] seen in ''[[Rayman 3: Hoodlum Havoc|Rayman 3]]'' are anywhere to be seen in this area. This level features three types of enemies: [[Slapdash]]es, [[Ninja Crab]]s and [[Podocrock]]s. | Neither [[Fairy|fairies]] or [[the Fairy Council]] seen in ''[[Rayman 3: Hoodlum Havoc|Rayman 3]]'' are anywhere to be seen in this area. This level features three types of enemies: [[Slapdash]]es, [[Ninja Crab]]s and [[Podocrock]]s. | ||
| Line 28: | Line 28: | ||
==Screenshots== | ==Screenshots== | ||
<gallery | <gallery widths="240px" heights="160px" class="sprite"> | ||
RHRFairyCouncil1.png|The starting point of the level. | |||
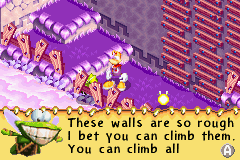
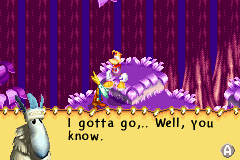
RHRFairyCouncil2.png|[[Murfy]] giving guidance to [[Rayman]]. | |||
RHRFairyCouncil3.png|Dangerous water that will damage [[Rayman]]. | |||
RHRFairyCouncil4.png|The [[Slapdash]] returning in ''[[Rayman: Hoodlum's Revenge|Hoodlums' Revenge]]''. | |||
RHRFairyCouncil5.png|Red and Yellow [[Lums]], as they appear in ''[[Rayman: Hoodlums' Revenge|Hoodlums' Revenge]]''. | |||
RHRFairyCouncil6.png|Green spikes that will hurt [[Rayman]] if he touches them. | |||
RHRFairyCouncil7.png|A [[Teensie]] saved from being in a [[cage]]. | |||
RHRFairyCouncil8.png|The gate that leads to the exit. | |||
</gallery> | </gallery> | ||
Revision as of 20:09, 26 September 2023
| The Fairy Council | |
|---|---|
 | |
| ← Introduction scene | Clearleaf Forest → |
      
| |

| |

| |
     
|

|
- This article is about the level in Rayman: Hoodlums' Revenge. For the level in Rayman 3, see the Fairy Council.
The Fairy Council is the first level in Rayman: Hoodlums' Revenge. As with many games in the Rayman series, it serves as a tutorial level in which Murfy will appear from time to time to give the player instructions in using Rayman's abilities and passing obstacles. Once the level has been completed, and if the player decides to return here, Murfy will not appear again. This level introduces Red Lums and Yellow Lums, which in this level there are 48 of them to be collected.
Description

Similar to the level of the same name in Rayman 3, this level is set in a place in which the grass is purple in colour. Much of the land is surrounded by golden railings and lampposts. However, large bodies of pink water surround the area as well as its many small islands, which Murfy describes as not looking "healthy", assuming that it has been poisoned. Rayman therefore cannot step in the water (and all other bodies of water and sharp obstacles in the game for that matter) for too long otherwise his health will quickly deteriorate to the point of game over. At the end of the level, there is a gate that has to be opened upon hitting a switch.
Neither fairies or the Fairy Council seen in Rayman 3 are anywhere to be seen in this area. This level features three types of enemies: Slapdashes, Ninja Crabs and Podocrocks.

Screenshots
-
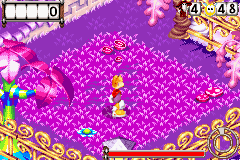 The starting point of the level.
 -
-
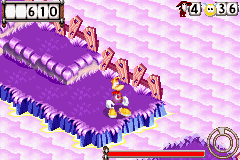 Dangerous water that will damage Rayman.
 -
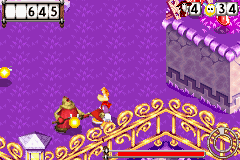 The Slapdash returning in Hoodlums' Revenge.
 -
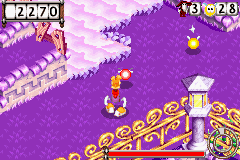 Red and Yellow Lums, as they appear in Hoodlums' Revenge.
 -
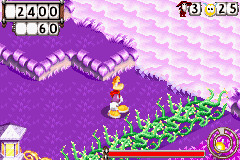 Green spikes that will hurt Rayman if he touches them.
 -
-
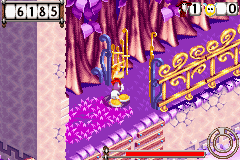 The gate that leads to the exit.


External links
- The Fairy Council playthrough at YouTube (Part 1/2)
- The Fairy Council playthrough at YouTube (Part 2/2)