Hoodmonger: Difference between revisions
No edit summary |
Hunchman801 (talk | contribs) m clean up |
||
| Line 1: | Line 1: | ||
{{Enemy | {{Enemy | ||
| name = Hoodmonger | | name = Hoodmonger | ||
| image = [[File:Rayman_3_Hoodblaster.png|300px|center| | | image = [[File:Rayman_3_Hoodblaster.png|300px|center|Hoodmonger]] | ||
| alignment = Bad | | alignment = Bad | ||
| species = [[Hoodlum]] | | species = [[Hoodlum]] | ||
| appears in = ''[[Rayman 3]]'', ''[[Rayman: Hoodlums' Revenge]]'', ''[[Rayman Kart]]'' | | appears in = ''[[Rayman 3]]'', ''[[Rayman: Hoodlums' Revenge]]'', ''[[Rayman Kart]]'' | ||
| location = [[The Fairy Council]], [[Clearleaf Forest]], [[the Bog of Murk]], [[The Land of the Livid Dead (Rayman 3)|the Land of the Livid Dead]], [[the Desert of the Knaaren]], [[the Summit Beyond the Clouds]], [[Hoodlum Headquarters]], [[the Tower of the Leptys]], ''[[Wanna Kick Rayman?]]'', [[Commando]], [[Razoff Circus]] (as a target), [[Vertiginous Riddle]], [[Hoodlum Moor]], [[Land of the Livid Dead (Rayman: Hoodlums' Revenge)|Land of the Livid Dead]], [[Menhirs of Power]] | | location = [[The Fairy Council]], [[Clearleaf Forest]], [[the Bog of Murk]], [[The Land of the Livid Dead (Rayman 3)|the Land of the Livid Dead]], [[the Desert of the Knaaren]], [[the Summit Beyond the Clouds]], [[Hoodlum Headquarters]], [[the Tower of the Leptys]], ''[[Wanna Kick Rayman?]]'', [[Commando]], [[Razoff Circus]] (as a target), [[Vertiginous Riddle]], [[Hoodlum Moor]], [[Land of the Livid Dead (Rayman: Hoodlums' Revenge)|Land of the Livid Dead]], [[Menhirs of Power]] | ||
| resistance = [[ | | resistance = [[File:Lifebar3.png|3 HP]]<ref name="dmg">Depending on the charging time, [[Rayman]] can inflict the following damage with his fists: | ||
* [[Telescopic fist|Standard fist]]: 1; 1.25; 1.5; 1.75; 2; 2.25; 2.5; 2.75; 3 | * [[Telescopic fist|Standard fist]]: 1; 1.25; 1.5; 1.75; 2; 2.25; 2.5; 2.75; 3 | ||
* [[Heavy Metal Fist]]: 2; 2.5; 3; 3.5; 4; 4.5; 5; 5.5; 6</ref> | * [[Heavy Metal Fist]]: 2; 2.5; 3; 3.5; 4; 4.5; 5; 5.5; 6</ref> | ||
[[ | [[File:Lifebar2.png|2 HP]]<ref name="dmg" /> (behind shield) | ||
| attacks = Gun shots (''[[Rayman 3: Hoodlum Havoc|Rayman 3]]''), triple pellet shot (''[[Rayman: Hoodlums' Revenge]]'') | | attacks = Gun shots (''[[Rayman 3: Hoodlum Havoc|Rayman 3]]''), triple pellet shot (''[[Rayman: Hoodlums' Revenge]]'') | ||
}} | }} | ||
| Line 17: | Line 17: | ||
{{quote|text=An exceptional marksman. There's no-one better to display a rifle.|sign=In-game description|source=''[[Rayman 3]]''}} | {{quote|text=An exceptional marksman. There's no-one better to display a rifle.|sign=In-game description|source=''[[Rayman 3]]''}} | ||
'''Hoodmonger Privates, First Class''', also known as '''Hoodblasters''',<ref>The name comes from the North American version of ''[[Rayman 3]]'' and [[Rayman 3: Hoodlum Havoc: Official Strategy | '''Hoodmonger Privates, First Class''', also known as '''Hoodblasters''',<ref>The name comes from the North American version of ''[[Rayman 3]]'' and [[Rayman 3: Hoodlum Havoc: Official Strategy Guide|the official strategy guide of the same game]].</ref> are musket-wielding [[Hoodlum]] sharpshooter grunts that appear in ''[[Rayman 3]]'', ''[[Rayman: Hoodlums' Revenge]]'' and ''[[Rayman Kart]]''. | ||
==Description== | ==Description== | ||
| Line 28: | Line 28: | ||
''[[Rayman: Hoodlums' Revenge]]'' also features Hoodmongers, in which they fire triple pellet shots instead of their regular gun shots. Even though the projectiles are different, their attack is similar to that of the [[Hoodmonger Officer]]s from [[Rayman 3|the previous game]]. | ''[[Rayman: Hoodlums' Revenge]]'' also features Hoodmongers, in which they fire triple pellet shots instead of their regular gun shots. Even though the projectiles are different, their attack is similar to that of the [[Hoodmonger Officer]]s from [[Rayman 3|the previous game]]. | ||
<gallery | <gallery widths="320px" heights="240px"> | ||
Charged.jpg|A Hoodmonger, as seen in ''[[Rayman 3]]''. | Charged.jpg|A Hoodmonger, as seen in ''[[Rayman 3]]''. | ||
HoodblasterEnglish.png|[[André]], in his Hoodmonger form. | HoodblasterEnglish.png|[[André]], in his Hoodmonger form. | ||
| Line 40: | Line 40: | ||
A [[scarecrow]] resembling a Hoodmonger appears in the intro sequence of ''[[Rayman Raving Rabbids TV Party]]''. | A [[scarecrow]] resembling a Hoodmonger appears in the intro sequence of ''[[Rayman Raving Rabbids TV Party]]''. | ||
<gallery | <gallery widths="320px" heights="240px"> | ||
Hoodlum Scarecrow.JPG|A scarecrow resembling a Hoodmonger (on the right) as seen in a cinematic from ''[[Rayman Raving Rabbids TV Party]]''. | Hoodlum Scarecrow.JPG|A scarecrow resembling a Hoodmonger (on the right) as seen in a cinematic from ''[[Rayman Raving Rabbids TV Party]]''. | ||
Hoodblaster_RK.PNG|class=sprite|A Hoodmonger, as he appears in ''[[Rayman Kart]]''. | Hoodblaster_RK.PNG|class=sprite|A Hoodmonger, as he appears in ''[[Rayman Kart]]''. | ||
| Line 49: | Line 49: | ||
==Early concept art and artwork gallery== | ==Early concept art and artwork gallery== | ||
<gallery perrow="6"> | <gallery perrow="6"> | ||
Rayman_3_Hoodblaster_Concept.png | |||
R3HH-Hoodmonger-DevelopmentConceptArt-1.jpg | |||
R3HH-Hoodmonger-DevelopmentConceptArt-2.jpg | |||
R3HH-Hoodmonger-DevelopmentConceptArt-3.jpg | |||
Concepthoodlums1.jpg | |||
R3HH-HoodmongerGun-DevelopmentArtwork.jpg | |||
R3HH-EarlyHoodmonger-Artwork.jpg | |||
</gallery> | </gallery> | ||
==Artwork gallery== | ==Artwork gallery== | ||
<gallery perrow="6"> | <gallery perrow="6"> | ||
R3HH-FightingHoodmongers-ConceptArt.jpg | |||
R3HH-HoodmongerWireframedFace-DevelopmentArtwork.jpg | |||
R3HH-WireframeHoodmonger-Artwork.jpg | |||
R3HH-HoodmongerAtDarkness-Artwork.jpg | |||
R3HH-Hoodmonger-Artwork.jpg | |||
Rayman3_wp09_1024x768.jpg | |||
Rayman3_wp04_1280x1024.jpg | |||
Wall_hoodlums_01.jpg | |||
Rayman3_wanted_1024.jpg | |||
R3HH-HoodmongerWanted-Artwork.jpg | |||
Rayman 3 Hoodblaster Wanted Poster 1.png | |||
01_01_Market_24.jpg | |||
R3HH-RaymanAndHoodmonger.jpg | |||
Usual suspects 2.jpg | |||
Welcome.jpg | |||
</gallery> | </gallery> | ||
Revision as of 09:28, 25 September 2023
| Hoodmonger | ||
|---|---|---|
 | ||
| Alignment | Bad | |
| Appears in | Rayman 3, Rayman: Hoodlums' Revenge, Rayman Kart | |
| Location | The Fairy Council, Clearleaf Forest, the Bog of Murk, the Land of the Livid Dead, the Desert of the Knaaren, the Summit Beyond the Clouds, Hoodlum Headquarters, the Tower of the Leptys, Wanna Kick Rayman?, Commando, Razoff Circus (as a target), Vertiginous Riddle, Hoodlum Moor, Land of the Livid Dead, Menhirs of Power | |
| Resistance |  [1] [1]
| |
| Attacks | Gun shots (Rayman 3), triple pellet shot (Rayman: Hoodlums' Revenge) | |
| Species | Hoodlum | |

The most fanatic soldiers in the war to free the Dark Lum Lord are the Hoodblasters, known for the mighty boomsticks they tout with tyrannical authority. These gritty troops are the grunts of the Hoodlum Army and feature some of the most scattershot shooting skills ever seen. While off-duty, Hoodblasters live for the cutthroat competition of frog shooting tournaments.
An exceptional marksman. There's no-one better to display a rifle.—In-game description, Rayman 3
Hoodmonger Privates, First Class, also known as Hoodblasters,[3] are musket-wielding Hoodlum sharpshooter grunts that appear in Rayman 3, Rayman: Hoodlums' Revenge and Rayman Kart.
Description
Hoodmongers are the most common enemies and Hoodlums in Rayman 3 and Rayman: Hoodlums' Revenge. They wear brown sack-clothes and hats, and their eyes are red or white. They use two types of shotguns to attack Rayman, and they can sometimes be tricked into shooting one another. In certain areas Hoodmongers can hide behind rotatable wooden shields to protect themselves. Due to a hole in the shield for their guns, they are still able to attack. Despite the protection, Rayman can defeat them with curved shots. Behind shields, Hoodmongers have a lower resistance, and give fewer points when defeated.
Hoodmongers appear in all the worlds, with the exception of the Longest Shortcut. Their final in-game appearance is in the final battle with the Leptys/Reflux, during which André spawns an army of them with the Sceptre of the Leptys.
A Hoodmonger also appears in the Wanna Kick Rayman? vignettes, which are presented as fictional instruction videos in which a Hoodmonger teaches the viewer how to kill Rayman.
Rayman: Hoodlums' Revenge also features Hoodmongers, in which they fire triple pellet shots instead of their regular gun shots. Even though the projectiles are different, their attack is similar to that of the Hoodmonger Officers from the previous game.
-
 A Hoodmonger, as seen in Rayman 3.
 -
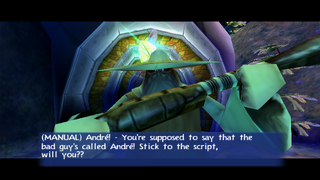 André, in his Hoodmonger form.
 -
 A Hoodmonger can be seen in the PC's beta demo loading screen of Rayman 3. It also had a different design during the development of the game.
 -
 A Hoodmonger in Rayman: Hoodlums' Revenge.
 -
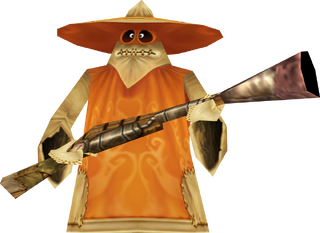 A Hoodmonger, as appearing in the final stage in the Tower of the Leptys.


A Hoodmonger acts as one of the playable racers in Rayman Kart. His special power is to release an evil Lum which steals bonuses from the other racers.
A scarecrow resembling a Hoodmonger appears in the intro sequence of Rayman Raving Rabbids TV Party.
-
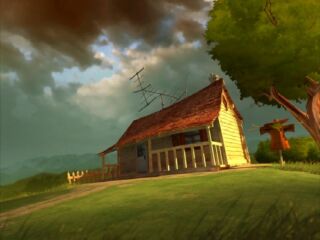 A scarecrow resembling a Hoodmonger (on the right) as seen in a cinematic from Rayman Raving Rabbids TV Party.
 -
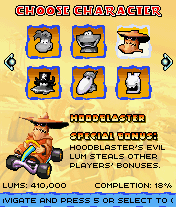 A Hoodmonger, as he appears in Rayman Kart.


Early concept art and artwork gallery


Artwork gallery


References
- ↑ 1.0 1.1 Depending on the charging time, Rayman can inflict the following damage with his fists:
- Standard fist: 1; 1.25; 1.5; 1.75; 2; 2.25; 2.5; 2.75; 3
- Heavy Metal Fist: 2; 2.5; 3; 3.5; 4; 4.5; 5; 5.5; 6
- ↑ Team Xbox, Enemies Revealed, http://news.teamxbox.com/xbox/3666/Rayman-3-Enemies-Revealed/
- ↑ The name comes from the North American version of Rayman 3 and the official strategy guide of the same game.
| Hoodlums | ||||
|---|---|---|---|---|
| Hoodlums from Rayman 3 | ||||
| André • Black Lum • Hoodmonger • Slapdash • Hoodmonger Soldier • Hoodboom • Master Kaag • Stumbleboom • Spinneroo • Hoodstormer • Hoodlum airship • Grim Keeper • Grim • Hoodoo • Hoodmonger Officer • Heckler • Céloche • Lavomatrix • Hoodlum watercraft • Hoodloon • Hostess • Armaguiddon | ||||
| Hoodlums from Rayman 3 (Game Boy Advance) and Rayman: Hoodlums' Revenge | ||||
| Armoured Slapdash • Shielded Hoodboom • Scaleman • Armed Spinneroo • Helicopter bomb | ||||
| Scrapped Hoodlums | ||||
| Lav-O-Matic • Kagalpha • Conjoined Hoodlum • Kagoubinôme • Gunslinger Hoodlum | ||||
| Enemies from Rayman 3 | ||||
|---|---|---|---|---|
| Hoodlums • Knaaren • Muddibog • Nettle • Ninja Crab • Piranha • Podocrock • Zombie Chicken | ||||