Punching Plateaus: Difference between revisions
The Jonster (talk | contribs) new links |
Hunchman801 (talk | contribs) No edit summary |
||
| Line 11: | Line 11: | ||
| medallion slot 4 = [[File:Icon1RO.png|15px|1]][[File:Icon5RO.png|15px|5]][[File:Icon0RO.png|15px|0]] [[File:RO-Lums.png|30px|Lums]] | | medallion slot 4 = [[File:Icon1RO.png|15px|1]][[File:Icon5RO.png|15px|5]][[File:Icon0RO.png|15px|0]] [[File:RO-Lums.png|30px|Lums]] | ||
| medallion slot 5 = [[File:Icon3RO.png|15px|3]][[File:Icon0RO.png|15px|0]][[File:Icon0RO.png|15px|0]] [[File:RO-Lums.png|30px|Lums]] | | medallion slot 5 = [[File:Icon3RO.png|15px|3]][[File:Icon0RO.png|15px|0]][[File:Icon0RO.png|15px|0]] [[File:RO-Lums.png|30px|Lums]] | ||
| medallion slot 6 = [[File:Icon1RO.png|15px|1]][[File:IconColonRO.png|6px| | | medallion slot 6 = [[File:Icon1RO.png|15px|1]][[File:IconColonRO.png|6px|:]][[File:Icon4RO.png|15px|4]][[File:Icon0RO.png|15px|0]] [[File:RO-Clock.png|30px|Time]] | ||
| medal = [[File:Icon3RO.png|15px|3]][[File:Icon5RO.png|15px|5]][[File:Icon0RO.png|15px|0]] | | medal = [[File:Icon3RO.png|15px|3]][[File:Icon5RO.png|15px|5]][[File:Icon0RO.png|15px|0]] | ||
| coin = [[File:Icon5RO.png|15px|5]] | | coin = [[File:Icon5RO.png|15px|5]] | ||
| cup = [[File:Icon1RO.png|15px|1]][[File:IconColonRO.png|6px| | | cup = [[File:Icon1RO.png|15px|1]][[File:IconColonRO.png|6px|:]][[File:Icon1RO.png|15px|1]][[File:Icon7RO.png|15px|7]] | ||
| relic = [[File:Icon2RO.png|15px|2]] | | relic = [[File:Icon2RO.png|15px|2]] | ||
}} | }} | ||
'''Punching Plateaus''' is the fourth level of the [[Jibberish Jungle]], the first world in ''[[Rayman Origins]]''. As the name implies, attacking plays an important role in this level, | '''Punching Plateaus''' is the fourth level of the [[Jibberish Jungle]], the first world in ''[[Rayman Origins]]''. As the name implies, attacking plays an important role in this level, which is filled with multiple breakable walls and enemies, the most common of which are the [[Livingstone|Lividstones]]. This is the third level to not be included in the [[Back to Origins]] mode in ''[[Rayman Legends]]''. It was formerly known as '''Way Of The Fist'''. | ||
==Area 1== | ==Area 1== | ||
[[The Magician]] is seen at the start of the level on the left again and will tell the | [[The Magician]] is seen at the start of the level on the left again and will tell the heroes about [[bulb-o-Lum]]s, charging their attacks and ground pounding if they attack or jump on his hat. Afterwards the heroes must defeat [[Livingstone|Lividstones]] while avoiding dangerous waters containing [[tentacle claw]]s. The [[Platformman]] also makes his first appearance in this area. The first [[Skull Coin]] is hidden on a small cave with plants, under the cliff with the [[Livingstone|Lividstone]] standing on a [[nenuphar]] next to a green [[bulb]]. To get it, the heroes must fall while making contact with the right wall, then perform a walljump to get into the cave. Then, the heroes can go back to where they were using a regular walljump. | ||
<gallery widths="320px" heights="180px"> | <gallery widths="320px" heights="180px"> | ||
Punching Plateaus 1.jpg|The first area of the level. | Punching Plateaus 1.jpg|The first area of the level. | ||
Punching Plateaus 2.jpg|[[Platformman]]'s first appearance. | Punching Plateaus 2.jpg|The [[Platformman]]'s first appearance. | ||
</gallery> | </gallery> | ||
==Area 2== | ==Area 2== | ||
[[File:Punching Plateaus 3.jpg|320px|thumb|right|The second area.]] | [[File:Punching Plateaus 3.jpg|320px|thumb|right|The second area.]] | ||
Upon entering the area, the heroes encounter [[Antitoon|Darktoons]] for the first time in the game. After defeating them, the heroes must make climb out of the chasm to get to the top, by performing more walljumps, using a horizontal vine, and bouncing on [[flower bumper]]s. The exit can be found to the right, however, the [[#Secret area 1|first secret area]] can be found on the left, with an [[Electoon]] [[cage]] inside; the heroes can crush attack the wooden platform below and hit the green [[bulb]], which will create a [[flower bumper]], making the area easily accessible. | Upon entering the area, the heroes encounter [[Antitoon|Darktoons]] for the first time in the game. After defeating them, the heroes must make climb out of the chasm to get to the top, by performing more walljumps, using a horizontal vine, and bouncing on [[flower bumper]]s. The exit can be found to the right, however, the [[#Secret area 1|first secret area]] can be found on the left, with an [[Electoon]] [[cage]] inside; the heroes can crush attack the wooden platform below and hit the green [[bulb]], which will create a [[flower bumper]], making the area easily accessible. | ||
| Line 35: | Line 36: | ||
===[[Relic]] 1=== | ===[[Relic]] 1=== | ||
[[File:Punching Plateaus first relic.png|thumb|left|320px|The first [[relic]] can be found above the heroes, just below the [[flower bumper]].]] | |||
The first [[relic]] can be found directly above the heroes just as they enter this area. | The first [[relic]] can be found directly above the heroes just as they enter this area. | ||
{{Clear}} | {{Clear}} | ||
| Line 42: | Line 44: | ||
===Secret area 1=== | ===Secret area 1=== | ||
[[File:Punching Plateaus 4.jpg|320px|thumb|right|The first secret area.]] | [[File:Punching Plateaus 4.jpg|320px|thumb|right|The first secret area.]] | ||
The heroes must defeat four [[Livingstone|Lividstones]] guarding the [[cage]], while being careful to avoid falling into the [[spiky flower]] pit. They can do this manually, or use [[Swingman]] to swing over them and hit the [[bulb]], causing the platforms the [[Livingstone|Lividstones are standing on to disappear, making them fall into the pit. | |||
The heroes must defeat four [[Livingstone|Lividstones]] guarding the [[cage]], while being careful to avoid falling into the [[spiky flower]] pit. They can do this manually, or use a [[Swingman]] to swing over them and hit the [[bulb]], causing the platforms the [[Livingstone|Lividstones are standing on to disappear, making them fall into the pit. | |||
{{Clear}} | {{Clear}} | ||
==Area 3== | ==Area 3== | ||
Similar to the first area, the heroes must defeat [[Livingstone|Lividstones]] and avoid dangerous waters. Even though an [[Electoon]] can be heard crying for help, it is not in this area. The second [[Skull Coin]] can be found here, hidden inside of a [[bulb-o-Lum]] next to the [[Swingman]]. When the heroes hit the bulb, a [[bubble]] containing the [[Skull Coin|coin]] will come out and | Similar to the first area, the heroes must defeat [[Livingstone|Lividstones]] and avoid dangerous waters. Even though an [[Electoon]] can be heard crying for help, it is not in this area. The second [[Skull Coin]] can be found here, hidden inside of a [[bulb-o-Lum]] next to the [[Swingman]]. When the heroes hit the bulb, a [[bubble]] containing the [[Skull Coin|coin]] will come out and appear right in the other side of the water. The heroes must then collect the [[Skull Coin|coin]] quickly before the bubble explodes, while avoiding the [[tentacle claw]]. The third [[Skull Coin]] can be obtained after hitting the [[explosive bulb]] and performing a walljump in the upper area. | ||
<gallery widths="320px" heights="180px"> | <gallery widths="320px" heights="180px"> | ||
| Line 56: | Line 59: | ||
==Area 4== | ==Area 4== | ||
[[File:Punching Plateaus 7.jpg|320px|thumb|right|The fourth area.]] | [[File:Punching Plateaus 7.jpg|320px|thumb|right|The fourth area.]] | ||
This short area is very luscious with life, with clean waters and flowers that hold [[Lum (UbiArt games)|Lums]] in [[bubble]]s. Below of the starting area lies the [[#Secret area 2|second secret area]]. | This short area is very luscious with life, with clean waters and flowers that hold [[Lum (UbiArt games)|Lums]] in [[bubble]]s. Below of the starting area lies the [[#Secret area 2|second secret area]]. | ||
| Line 62: | Line 66: | ||
===Secret area 2=== | ===Secret area 2=== | ||
[[File:Punching Plateaus 8.jpg|320px|thumb|left|The second secret area.]] | [[File:Punching Plateaus 8.jpg|320px|thumb|left|The second secret area.]] | ||
Filled with curvy water currents, the heroes must time their jumps to defeat two [[Livingstone|Lividstones]] guarding the [[cage]]. If they miss one, they can use the [[flower bumper]]s to bounce back up and defeat them. | Filled with curvy water currents, the heroes must time their jumps to defeat two [[Livingstone|Lividstones]] guarding the [[cage]]. If they miss one, they can use the [[flower bumper]]s to bounce back up and defeat them. | ||
| Line 76: | Line 81: | ||
===[[Relic]] 2=== | ===[[Relic]] 2=== | ||
[[File:Punching Plateaus second relic.png|thumb|right|320px|The second [[relic]], above the [[tentacle claw]].]] | |||
The second [[relic]] can be found in this area just above a [[tentacle claw]]. | The second [[relic]] can be found in this area just above a [[tentacle claw]]. | ||
{{clear}} | {{clear}} | ||
| Line 83: | Line 89: | ||
==Area 6== | ==Area 6== | ||
[[File:Punching Plateaus 12.jpg|320px|thumb|left|The sixth and final area.]] | [[File:Punching Plateaus 12.jpg|320px|thumb|left|The sixth and final area.]] | ||
The heroes must defeat five [[Livingstone|Lividstones]] in order to be able to break the [[cage]] to end the level. Then the heroes pose | |||
The heroes must defeat five [[Livingstone|Lividstones]] in order to be able to break the [[cage]] to end the level. Then the heroes pose for [[the Photographer]] and watch [[the Magician]] wait in anticipation for the total amount of [[Lum (UbiArt games)|Lums]] the heroes collected throughout the level. | |||
{{Clear}} | {{Clear}} | ||
Revision as of 15:49, 27 August 2024
| Punching Plateaus | |||||||||||
|---|---|---|---|---|---|---|---|---|---|---|---|
 | |||||||||||
| ← Geyser Blowout | Go With The Flow → | ||||||||||
 Jibberish Jungle Jibberish Jungle
| |||||||||||
   
|

|

| |||||||||
   
|
|
  
| |||||||||

|
 
| ||||||||||

Punching Plateaus is the fourth level of the Jibberish Jungle, the first world in Rayman Origins. As the name implies, attacking plays an important role in this level, which is filled with multiple breakable walls and enemies, the most common of which are the Lividstones. This is the third level to not be included in the Back to Origins mode in Rayman Legends. It was formerly known as Way Of The Fist.
Area 1
The Magician is seen at the start of the level on the left again and will tell the heroes about bulb-o-Lums, charging their attacks and ground pounding if they attack or jump on his hat. Afterwards the heroes must defeat Lividstones while avoiding dangerous waters containing tentacle claws. The Platformman also makes his first appearance in this area. The first Skull Coin is hidden on a small cave with plants, under the cliff with the Lividstone standing on a nenuphar next to a green bulb. To get it, the heroes must fall while making contact with the right wall, then perform a walljump to get into the cave. Then, the heroes can go back to where they were using a regular walljump.
-
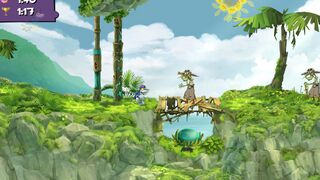 The first area of the level.
 -
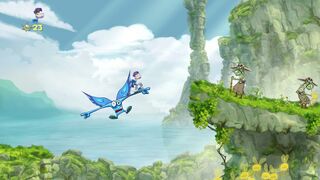 The Platformman's first appearance.


Area 2

Upon entering the area, the heroes encounter Darktoons for the first time in the game. After defeating them, the heroes must make climb out of the chasm to get to the top, by performing more walljumps, using a horizontal vine, and bouncing on flower bumpers. The exit can be found to the right, however, the first secret area can be found on the left, with an Electoon cage inside; the heroes can crush attack the wooden platform below and hit the green bulb, which will create a flower bumper, making the area easily accessible.
Relic 1

The first relic can be found directly above the heroes just as they enter this area.
Secret area 1

The heroes must defeat four Lividstones guarding the cage, while being careful to avoid falling into the spiky flower pit. They can do this manually, or use a Swingman to swing over them and hit the bulb, causing the platforms the [[Livingstone|Lividstones are standing on to disappear, making them fall into the pit.
Area 3
Similar to the first area, the heroes must defeat Lividstones and avoid dangerous waters. Even though an Electoon can be heard crying for help, it is not in this area. The second Skull Coin can be found here, hidden inside of a bulb-o-Lum next to the Swingman. When the heroes hit the bulb, a bubble containing the coin will come out and appear right in the other side of the water. The heroes must then collect the coin quickly before the bubble explodes, while avoiding the tentacle claw. The third Skull Coin can be obtained after hitting the explosive bulb and performing a walljump in the upper area.
-
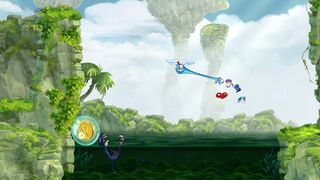 The third area of the level.
 -
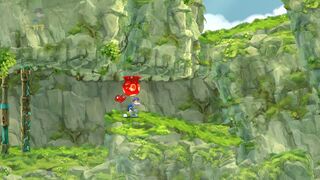 An explosive bulb that must be hit in order to continue.


Area 4

This short area is very luscious with life, with clean waters and flowers that hold Lums in bubbles. Below of the starting area lies the second secret area.
Secret area 2

Filled with curvy water currents, the heroes must time their jumps to defeat two Lividstones guarding the cage. If they miss one, they can use the flower bumpers to bounce back up and defeat them.
Area 5
The heroes must now use their combined skills of jumping and attacking in order to defeat Lividstones, while being careful to avoid falling into an abyss or dangerous waters. Timed jumps are key to avoid several spiky flowers that guard two Skull Coins in this area. To get the fourth one, the heroes must hit a green bulb to activate two nenuphars and jump on them; right after getting the Skull Coin, the heroes must hit the blue bulb quickly to make the spiky flowers below disappear. The fifth coin is right between two spiky flowers; the heroes must crush attack a flower bumper in order to reach it.
-
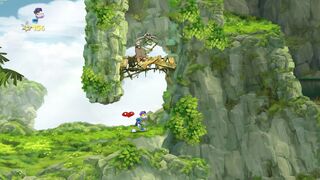 The fifth area of the level.
 -
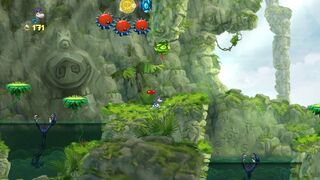 The fourth Skull Coin.
 -
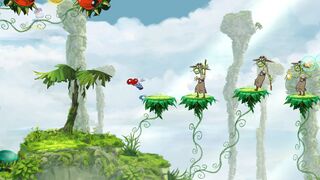 A small group of Lividstones.


Relic 2

The second relic can be found in this area just above a tentacle claw.
Area 6

The heroes must defeat five Lividstones in order to be able to break the cage to end the level. Then the heroes pose for the Photographer and watch the Magician wait in anticipation for the total amount of Lums the heroes collected throughout the level.
External links
- Punching Plateaus playthrough at YouTube (PC version) (Normal walkthrough + Lums Medal)
- Punching Plateaus playthrough at YouTube (PC version) (Speed Trophy)