Best Original Score
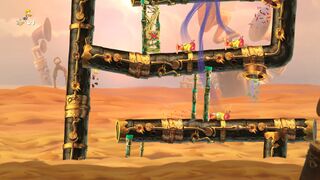
Best Original Score is the second level of the Desert of Dijiridoos, the second world in Rayman Origins. The heroes must use friendly green notebirds and bumper notebirds to advance throughout the level, as well as small platforms that deactivate blocking vibrating strings. The PlayStation Vita version of Rayman Origins features a Ghost Mode of this level. This level is the first from this world and ninth overall that is included in the Back to Origins painting in Rayman Legends.
Original version
| Best Original Score | |||||
|---|---|---|---|---|---|
 | |||||
| ← Crazy Bouncing | Cacophonic Chase → | ||||
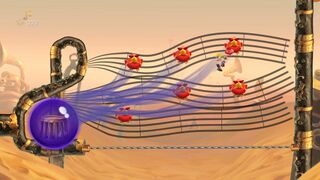
Area 1
As the heroes enter the level, the Magician can be seen to their left; he gives them some information about saving Electoon cages, and popping bubblized enemies to earn more Lums. The heroes can then move on, jumping on friendly green notebirds that remain stationary on music sheets. The first Skull Coin can be found by passing a water current, under a hostile red bird. Afterwards, they will encounter another red bird bouncing on a platform which makes the friendly green notebirds appear or disappear. The heroes can defeat the hostile red bird and use the friendly ones to advance. The rounded bumper notebird can be crush attacked to reach the second Skull Coin of the level. Eventually, after defeating some Darktoons, the heroes will hear an Electoon crying for help. To reach the secret area, the heroes must perform wall jumps and climb to the top, nearby are some helmet birds. Once the Electoons are saved, the heroes can proceed to the exit.

Secret area 1
The cage can be found at the bottom of the area. The heroes will need to glide to safely defeat the red birds as they descend. Once they are defeated, the cage can be broken.
-
 The first secret area.

Relic 1

The first relic can be found above the exit in this area.
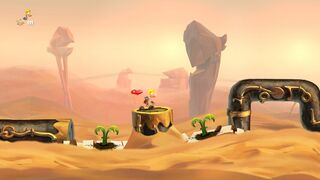
Area 2
The heroes will need to advance, while avoiding some vibrating strings. Afterwards, the heroes must use a small green notebird to pass more vibrating strings; it will release a Skull Coin in a bubble, the third coin of the level. As the heroes approach the exit, there is a bumper notebird nearby; the heroes can obtain the fourth Skull Coin if they crush attack the bird. The exit can be found beneath the coin.
-

-
 The fourth Skull Coin.


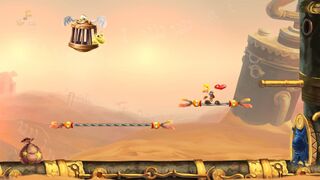
Area 3
The heroes will need to use more friendly birds and advance to where they will encounter several vibrating strings. All harmful vibrations can be temporarily deactivated by jumping on a small platform. There is a switch that can make three green birds appear if activated; performing a crush attack on the last one will help the heroes reach the fifth Skull Coin of the level, located next to a spiky bird. The exit can be found ahead, next to a sleeping red bird.
-
 Vibrating strings that can be deactivated from using the stationary platform.
 -
 The fifth Skull Coin of the level.


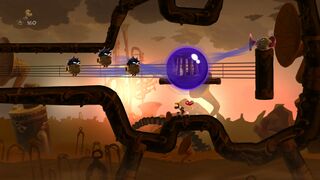
Area 4
As the heroes defeat a few red birds along the way, more vibrating strings will block their path. Using a small platform to deactivate them and taking the higher path will allow them to reach the sixth Skull Coin. The second secret area is not too far away; the heroes need to perform wall jumps to ascend to reach it. Once the Electoons are saved, the heroes must activate two groups of friendly birds, the others will appear by themselves, as if they were linked to a gendoor. The heroes can reach the exit by using the Swingman.
Secret area 2

In this very dark area, the heroes must defeat some helmet birds and a blowing bird. Once all are defeated, the cage can be broken.
Relic 2

The second relic can be found in this area just after the heroes pass some piano keys.
Area 5

The heroes must defeat the sleeping red birds to break the Electoon cage. Breaking the cage ends the level, and the heroes will pose on a photoboard as the Magician waits to see how many Lums were collected throughout the level.
Back to Origins
| Best Original Score | ||||||||
|---|---|---|---|---|---|---|---|---|
 | ||||||||
| ← Poor Little Daisy | Tricky Winds → | |||||||
This level is playable in the Back to Origins mode in Rayman Legends as the first one from the Desert of Dijiridoos. There are few notable differences between the versions, except for the notable differences that appear in every other Back to Origins level.
However, this level is unique for having one significant difference between the versions, being that the first secret area has been altered. Rather than using a modified version of the secret area from the original level, it uses a secret area from the Rayman Origins level High Voltage instead. This is the only level in Back to Origins that uses an area from a different level in this manner.
-
 The beginning of the level, with already some notable differences.
 -
 The first secret area.
 -
 Another look at the same area.
 -
 Assassin Ray standing in front of two birds.
 -
 Turnips appear in the Back to Origins levels.
 -
 Teensies replace many of the Skull Coins.
 -
 The second secret area, this time in Rayman Legends.
 -
 The final area of the level.


Trivia
- The level’s name may be a pun on the Academy Award for Best Original Score.
- If the player collected all of the Electoons in this level and the previous levels, the count will be at 45. This is enough to unlock the second Tricky Treasure level, Cacophonic Chase.
Names in other languages
| Language | Name |
|---|---|
| English | Best Original Score |
| Arabic | أفضل نتيجة أصلية |
| Chinese (simplified) | 最佳原创音乐 |
| Czech | Nejlepší původní skóre |
| Danish | Bedste originalmusik |
| Dutch | Aardnoten |
| Finnish | Paras alkuperäisteos |
| French | Meilleure musique |
| German | Beste Filmmusik |
| Hungarian | Legjobb zene |
| Italian | Miglior colonna sonora originale |
| Japanese | さいこう とくてん (Rayman Origins)
「楽譜に群がる鳥」 (Rayman Legends) |
| Norwegian | Beste originalmusikk |
| Polish | Najlepszy podkład muzyczny |
| Portuguese | Melhor trilha sonora original (Rayman Origins)
Melhor trilha original (Rayman Legends) |
| Russian | Лучшее музыкальное произведение |
| Spanish | Mejor banda sonora original |
| Swedish | Bästa originalmusik |
External links
- Best Original Score playthrough at YouTube (PC version) (Normal walkthrough + Lums Medal)
- Best Original Score playthrough at YouTube (PC version) (Speed Trophy)
- Best Original Score's Rayman Legends playthrough at YouTube (PC version)