Swinging Caves
Swinging Caves is the sixth level of the Jibberish Jungle, the first world in Rayman Origins. It is primarily set in forest caves and centers around timing jumps while avoiding tentacle claw-infested water.
This level is part of the demo that was released on the PlayStation Network and Xbox Live on November 9, 2011. The PlayStation Vita version of Rayman Origins features a Ghost Mode of this level, and it is also the third playable level from the Jibberish Jungle in the Back to Origins mode of Rayman Legends.
Swinging Caves is notable for featuring the location of Rayman's birth as shown in the Rayman Origins E3 2010 trailer, where he is created by Betilla the fairy. This depiction, however, contradicts other accounts of Rayman's birth, such as the one from the Rayman 2 manual and the one from the Rayman Origins website and manual.
Original version
| Swinging Caves | |||||
|---|---|---|---|---|---|
 | |||||
| ← Go With The Flow | Over the Rainbow → | ||||
Area 1
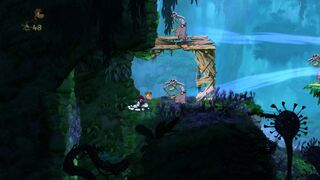
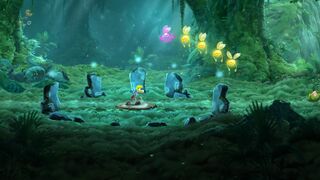
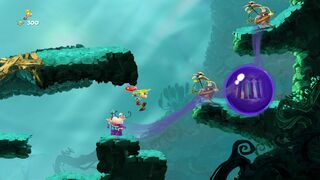
The heroes land in a clearing, surrounded by five mysterious pillars with Lums on top. This is the location of Rayman's birth in the Rayman Origins E3 2010 trailer, although there are several conflicting accounts of Rayman's creation. One account, found in the Rayman Origins website and manual, states that it is the five nymphs who created Rayman, not just Betilla. The five bright and luminous pillars could represent the nymphs. There are many water lilies ahead, along with two Lividstones. There are two Skull Coins near the end of the area. For the first one, the heroes will have to drop down cautiously, as there is an abyss below, and the water lily on which the heroes need to land moves horizontally. The second Skull Coin can be found to the far left of the first Skull Coin, hiding behind some foreground vines; contact with the vines will make them disappear, revealing the Skull Coin. The exit is not far from here; the heroes will need to make use of the remaining water lilies and perform wall jumps to reach it.
-
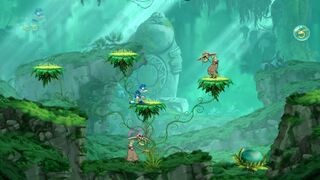 The first area.

Relic 1
The first relic can be found in the foreground directly below a Lividstone.
-
 The first relic can be found in the foreground.

Area 2
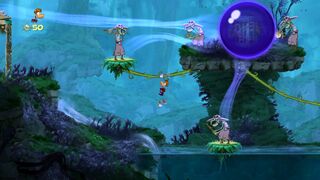
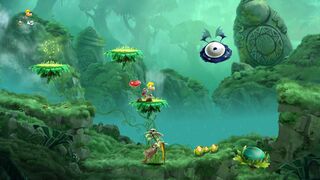
The heroes must use a Swingman to cross the water. The first secret area can be found to the top left of a platform where three Lividstones are located. Afterwards, the heroes can proceed to a large body of tentacle claw-infested water. To proceed, they will need to jump on the moving water lilies. Taking the higher path will require activating a bouncy flower; using it will lead to the third Skull Coin, located underneath a platform which will collapse and threaten to crush the heroes. The exit can be found nearby, but the heroes will need to dodge a tentacle claw in another body of water, then climb up and defeat two Lividstones along the way.
-
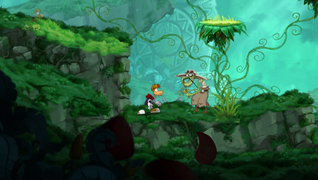
 A group of Lividstones in the second area.
 -
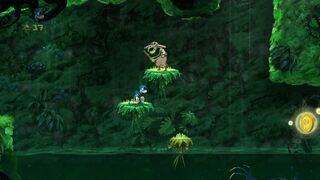 The third Skull Coin, guarded by a tentacle claw.


Secret area 1

There are seven Lividstones in this area, all standing between wooden barriers. The heroes need to perform a crush attack onto a large bouncy flower to reach the top and destroy the Lividstones. The Electoon cage is at the bottom left of the area. This area is likely a reference to the mobile game Angry Birds.
Relic 2

The second relic can be found in the background just over a pond. It is camouflaged, so it may be difficult to spot.
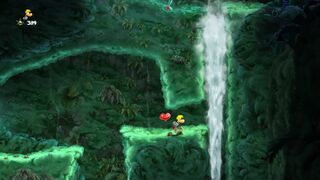
Area 3

As the heroes enter this very short area, they will encounter some water currents and eventually descend to a vine. Once the heroes grab onto the vine and drop down to a water lily, they will need to be careful, as there is an abyss below. The fourth Skull Coin is in this area at the bottom left of a wall; the heroes will need to jump off the wall as soon as they collect it. The second secret area is located to the right of the water lily, and like the first secret area, there are foreground vines hiding the door. Once completed, the heroes can use a Swingman to advance to the exit, which is guarded by a Lividstone.
Secret area 2

In this relatively dark place, the heroes will have to destroy three Lividstones and a hunter. Once all are defeated, the cage at the far left of the area can be broken.
Area 4

In this final area before reaching the cage, the heroes will need to ascend to reach the exit. First, a Swingman will assist them in reaching a bouncy flower, and then they will be led to another Swingman. After using it to ascend to a vine, the heroes continue past a couple of platforms; the second platform has a geyser at the end, which will push the heroes to the exit.
Area 5
The heroes must battle several Lividstones scattered throughout the area. Once they are defeated, the cage can be broken, thus ending the level. The Magician will then wait as the total amount of Lums collected throughout the level is counted, as the heroes pose on a photoboard.
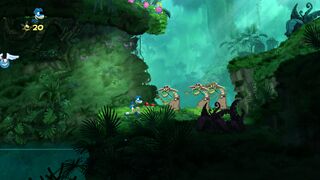
-
 The final area.
 -
 The cage in the final area.


Back to Origins
| Swinging Caves | ||||||||
|---|---|---|---|---|---|---|---|---|
 | ||||||||
| ← Hi-Ho Moskito! | Playing in the Shade → | |||||||
In the Back to Origins version, the only notable differences are some of the Rayman Legends elements that replace some from the original game.
-
 More Lums have been added to the level.
 -
 A Psychlops has been added to this location.
 -
 The platform needed to reach the Skull Coin has been increased in size, making it easier to land on.
 -
 Teensies have replaced many of the Skull Coins.
 -
 The lighting has been improved in several areas.
 -
 Turnips have been added.
 -
 There are no spiky platforms in Back to Origins.
 -
 Many of the foreground elements have been removed or repositioned to show more of the level.
 -
 The final area of the level.


Trivia
- If the player collects all of the Electoons in this level and the previous levels, the count will be 27. This is enough to unlock Can't Catch Me!, the first Tricky Treasure level.
Names in other languages
| Language | Name |
|---|---|
| English | Swinging Caves |
| Arabic | كهوف متأرجحة |
| Chinese (simplified) | 摇曳洞穴 |
| Czech | Houpající jeskyně |
| Danish | De svingende huler |
| Dutch | Slingerende grotten |
| Finnish | Keinuvat luolat |
| French | Grottes qui ballottent |
| German | Haltlose Höhlen |
| Hungarian | Táncoló barlangok |
| Italian | Caverne del ritmo |
| Japanese | ぶらぶら どうくつ (Rayman Origins)
「水たまりの洞くつ」 (Rayman Legends) |
| Norwegian | Svingende huler |
| Polish | Bujalne Jaskinie (Rayman Origins)
Bujalne jaskinie (Rayman Legends) |
| Portuguese | Cavernas melodiosas (Rayman Origins)
Cavernas vai e vem (Rayman Legends) |
| Russian | Шаткие Пещеры (Rayman Origins)
Шаткие пещеры (Rayman Legends) |
| Spanish | Cavernas de ida y vuelta |
| Swedish | Svingiga grottorna |
External links
- Swinging Caves playthrough at YouTube (PC version) (Normal walkthrough + Lums Medal)
- Swinging Caves playthrough at YouTube (PC version) (Speed Trophy)
- Swinging Caves playthrough at YouTube (Sony PlayStation 3's demo version) (Normal walkthrough + Lums Medal)
- Swinging Caves playthrough at YouTube (Sony PlayStation 3's demo version) (Speed Trophy)
- Swinging Caves' Rayman Legends playthrough at YouTube (PC version)