Up And Down: Difference between revisions
The Jonster (talk | contribs) links edit |
Hunchman801 (talk | contribs) Names in other languages |
||
| Line 5: | Line 5: | ||
| followed by = [[Hunter Gatherer]] | | followed by = [[Hunter Gatherer]] | ||
| world = [[Ticklish Temples]] | | world = [[Ticklish Temples]] | ||
| medallion slot 1 = [[File:RO-Cage.png|50px|Cage]] | | medallion slot 1 = [[File:RO-Cage.png|50px|Cage]] | ||
| medallion slot 2 = [[File:RO-Cage.png|50px|Cage]] | | medallion slot 2 = [[File:RO-Cage.png|50px|Cage]] | ||
| Line 11: | Line 10: | ||
| medallion slot 4 = [[File:Icon1RO.png|15px|1]][[File:Icon5RO.png|15px|5]][[File:Icon0RO.png|15px|0]] [[File:RO-Lums.png|30px|Lums]] | | medallion slot 4 = [[File:Icon1RO.png|15px|1]][[File:Icon5RO.png|15px|5]][[File:Icon0RO.png|15px|0]] [[File:RO-Lums.png|30px|Lums]] | ||
| medallion slot 5 = [[File:Icon3RO.png|15px|3]][[File:Icon0RO.png|15px|0]][[File:Icon0RO.png|15px|0]] [[File:RO-Lums.png|30px|Lums]] | | medallion slot 5 = [[File:Icon3RO.png|15px|3]][[File:Icon0RO.png|15px|0]][[File:Icon0RO.png|15px|0]] [[File:RO-Lums.png|30px|Lums]] | ||
| medallion slot 6 = [[File:Icon1RO.png|15px|1]][[File:IconColonRO.png|6px| | | medallion slot 6 = [[File:Icon1RO.png|15px|1]][[File:IconColonRO.png|6px|:]][[File:Icon5RO.png|15px|5]][[File:Icon0RO.png|15px|0]] [[File:RO-Clock.png|30px|Time]] | ||
| coin = [[File:Icon5RO.png|15px|5]] | |||
| medal = [[File:Icon3RO.png|15px|3]][[File:Icon5RO.png|15px|5]][[File:Icon0RO.png|15px|0]] | | medal = [[File:Icon3RO.png|15px|3]][[File:Icon5RO.png|15px|5]][[File:Icon0RO.png|15px|0]] | ||
| cup = [[File:Icon1RO.png|15px|1]][[File:IconColonRO.png|6px|:]][[File:Icon2RO.png|15px|2]][[File:Icon7RO.png|15px|7]] | |||
| cup = [[File:Icon1RO.png|15px|1]][[File:IconColonRO.png|6px| | |||
| relic = [[File:Icon3RO.png|15px|3]] | | relic = [[File:Icon3RO.png|15px|3]] | ||
}} | }} | ||
'''Up And Down''' is the second level of the [[Ticklish Temples]], a world in ''[[Rayman Origins]]''. Throughout the level, the heroes will need to use elements from the [[Jibberish Jungle]] to progress, such as [[nenuphar]]s. This | '''Up And Down''' is the second level of the [[Ticklish Temples]], a world in ''[[Rayman Origins]]''. Throughout the level, the heroes will need to use elements from the [[Jibberish Jungle]] to progress, such as [[nenuphar]]s. This level is not included in the [[Back to Origins]] painting in ''[[Rayman Legends]]''. | ||
==Area 1== | ==Area 1== | ||
At the beginning of this area, the heroes will need to use the [[nenuphar]]s | At the beginning of this area, the heroes will need to use the [[nenuphar]]s to pass a large abyss and a vertically moving platform. Some [[nenuphar]]s will need to be activated by hitting green [[bulb]]s. The first [[Skull Coin]] can be retrieved by sliding down the left side of the moving platform, then quickly wall jumping to safely land on a vertically moving [[nenuphar]]; the [[Skull Coin]] is hidden behind some foreground leaves. The second [[Skull Coin]] can be acquired by performing a crush attack on a [[flower bumper]], then carefully using the moving [[nenuphar]]s to avoid the [[Antitoon|Darktoons]]. As the heroes break through a barricade, the third [[Skull Coin]] can be acquired by performing a crush attack on a [[flower bumper]], then performing wall jumps to reach it; the exit can be found below. | ||
<gallery widths="320px" heights="180px"> | <gallery widths="320px" heights="180px"> | ||
| Line 30: | Line 29: | ||
===[[Relic]] 1=== | ===[[Relic]] 1=== | ||
[[File:Up And Down first relic.png|thumb|right|320px|The first [[relic]] can be found at the bottom of the platform to the left of [[Rayman]].]] | [[File:Up And Down first relic.png|thumb|right|320px|The first [[relic]] can be found at the bottom of the platform to the left of [[Rayman]].]] | ||
The first [[relic]] can be found in this area, | |||
The first [[relic]] can be found in this area, camouflaged in the foreground of a platform. | |||
{{Clear}} | {{Clear}} | ||
| Line 36: | Line 36: | ||
==Area 2== | ==Area 2== | ||
[[File:Up And Down 3.jpg|320px|thumb|left|The fourth [[Skull Coin]].]] | [[File:Up And Down 3.jpg|320px|thumb|left|The fourth [[Skull Coin]].]] | ||
The heroes will need to use | |||
The heroes will need to use more [[nenuphar]]s to proceed. The fourth [[Skull Coin]] can be collected by using a [[flower bumper]], then performing a wall jump to reach the [[Skull Coin]], located above some [[spiky flower]]s. The exit can be found nearby. | |||
{{Clear}} | {{Clear}} | ||
==Area 3== | ==Area 3== | ||
If the heroes crush attack on the first [[flower bumper]] in this area | If the heroes perform a crush attack on the first [[flower bumper]] in this area and then perform wall jumps, they will be able to reach the first secret area. Afterwards, the heroes can drop down, where they will need to perform wall jumps and use a [[Caterpillar (UbiArt games)|caterpillar]] to proceed. The heroes will need to carefully time their jumps to pass the vertically moving platforms. [[Tentacle claw]]-infested water will need to be avoided when jumping between [[nenuphar]]s. As the heroes encounter a larger body of water with a horizontally moving [[nenuphar]], they can perform wall jumps to reach the fifth [[Skull Coin]] in an area above. The exit can be found to the right of two [[Bulb-o-Lum]]s. | ||
<gallery widths="320px" heights="180px"> | <gallery widths="320px" heights="180px"> | ||
| Line 50: | Line 51: | ||
===Secret area 1=== | ===Secret area 1=== | ||
[[File:Up And Down 4.jpg|320px|thumb|left|The first secret area.]] | [[File:Up And Down 4.jpg|320px|thumb|left|The first secret area.]] | ||
The heroes will need to defeat the [[Livingstone|Lividstones]] in this area. Once all of them have been defeated, the [[Electoon]] [[cage]] can be broken. | The heroes will need to defeat the [[Livingstone|Lividstones]] in this area. Once all of them have been defeated, the [[Electoon]] [[cage]] can be broken. | ||
| Line 55: | Line 57: | ||
==Area 4== | ==Area 4== | ||
After the heroes pass some [[Livingstone|Lividstones]], they can collect the sixth [[Skull Coin]] of the level | After the heroes pass some [[Livingstone|Lividstones]], they can collect the sixth [[Skull Coin]] of the level. If they perform a crush attack on the [[flower bumper]], they can perform a wall jump, then [[Helicopter|glide]] to reach the [[Skull Coin]]. As they proceed, the heroes can use a [[champibumper]], which will launch them into the background; they can then use another [[champibumper]] to be launched back to the foreground, where the exit can be found. | ||
<gallery widths="320px" heights="180px"> | <gallery widths="320px" heights="180px"> | ||
Up And Down 7.jpg|The sixth [[Skull Coin]] of the level, in the fourth area. | Up And Down 7.jpg|The sixth [[Skull Coin]] of the level, in the fourth area. | ||
Up And Down 8.jpg|This [[champibumper]] can be used to jump to the background. | Up And Down 8.jpg|This [[champibumper]] can be used to jump to the background. | ||
Up And Down 9.jpg|The team needs to get to a different [[champibumper]] to | Up And Down 9.jpg|The team needs to get to a different [[champibumper]] to return to the foreground and reach the exit. | ||
</gallery> | </gallery> | ||
===[[Relic]] 2=== | ===[[Relic]] 2=== | ||
[[File:Up And Down second relic.png|thumb|right|320px|The second [[relic]] is located near the statue's eye, directly above [[Rayman]].]] | [[File:Up And Down second relic.png|thumb|right|320px|The second [[relic]] is located near the statue's eye, directly above [[Rayman]].]] | ||
The second [[relic]] can be found near the beginning of this area; it is located near the statue's eye. | The second [[relic]] can be found near the beginning of this area; it is located near the statue's eye. | ||
| Line 71: | Line 74: | ||
===[[Relic]] 3=== | ===[[Relic]] 3=== | ||
[[File:Up And Down third relic.png|thumb|left|320px|The third [[relic]] is located directly above [[Rayman]]'s hands.]] | [[File:Up And Down third relic.png|thumb|left|320px|The third [[relic]] is located directly above [[Rayman]]'s hands.]] | ||
The third [[relic]] can be found in this area; it is located in the background where the heroes are launched by the [[champibumper]]. | The third [[relic]] can be found in this area; it is located in the background where the heroes are launched by the [[champibumper]]. | ||
| Line 76: | Line 80: | ||
==Area 5== | ==Area 5== | ||
Near the beginning of this area, the heroes can use two [[flower bumper]]s, then perform a wall jump | Near the beginning of this area, the heroes can use two [[flower bumper]]s, then perform a wall jump to reach a [[Swingman]]; if they jump to the left from the [[Swingman]], they can perform wall jumps to reach the second secret area. Afterwards, the heroes will need to use more [[Swingman|Swingmen]] to reach the exit. | ||
<gallery widths="320px" heights="180px"> | <gallery widths="320px" heights="180px"> | ||
Up And Down 10.jpg|The fifth area of the level. | Up And Down 10.jpg|The fifth area of the level. | ||
Up And Down 13.jpg|A [[Swingman]] can help the players | Up And Down 13.jpg|A [[Swingman]] can help the players reach the exit. | ||
</gallery> | </gallery> | ||
===Secret area 2=== | ===Secret area 2=== | ||
In this secret area, the heroes must jump onto [[mosquito]]es | In this secret area, the heroes must jump onto [[mosquito]]es to reach the [[cage]]. They will need to avoid [[live missile]]s, then shoot projectiles at two [[Livingstone|Lividstones]] and a [[hunter]] to defeat them. Once the three enemies have been defeated, the heroes can disband their [[mosquito]]es and break the [[cage]]. | ||
<gallery widths="320px" heights="180px"> | <gallery widths="320px" heights="180px"> | ||
| Line 93: | Line 97: | ||
==Area 6== | ==Area 6== | ||
[[File:Up And Down 14.jpg|320px|thumb|right|The final area.]] | [[File:Up And Down 14.jpg|320px|thumb|right|The final area.]] | ||
The heroes will need to defeat two [[Livingstone|Lividstones]] in this area. Once they have been defeated, the [[Electoon]] [[cage]] can be broken, ending the level. The heroes will then pose on the [[The Photographer|photoboard]] as [[the Magician]] waits for the amount of [[Lum (UbiArt games)|Lums]] that were collected throughout the level. | The heroes will need to defeat two [[Livingstone|Lividstones]] in this area. Once they have been defeated, the [[Electoon]] [[cage]] can be broken, ending the level. The heroes will then pose on the [[The Photographer|photoboard]] as [[the Magician]] waits for the amount of [[Lum (UbiArt games)|Lums]] that were collected throughout the level. | ||
{{Clear}} | {{Clear}} | ||
==Names in other languages== | |||
{{Names | |||
|en=Up And Down | |||
|cs=Nahoru a dolů | |||
|nl=Op en neer | |||
|fr=Des hauts et des bas | |||
|de=Auf und nieder | |||
|hu=Fent és lent | |||
|it=Su e giù | |||
|ja=あがって さがって | |||
|pl=W górę i w dół | |||
|pt=Para cima e para baixo | |||
|ru=Вверх-вниз | |||
|es=Arriba y abajo | |||
}} | |||
==External links== | ==External links== | ||
Revision as of 11:27, 30 August 2024
| Up And Down | |||||||||||
|---|---|---|---|---|---|---|---|---|---|---|---|
 | |||||||||||
| ← Outta My Way | Hunter Gatherer → | ||||||||||
 Ticklish Temples Ticklish Temples
| |||||||||||
   
|

|

| |||||||||
   
|
|
  
| |||||||||

|
 
| ||||||||||

Up And Down is the second level of the Ticklish Temples, a world in Rayman Origins. Throughout the level, the heroes will need to use elements from the Jibberish Jungle to progress, such as nenuphars. This level is not included in the Back to Origins painting in Rayman Legends.
Area 1
At the beginning of this area, the heroes will need to use the nenuphars to pass a large abyss and a vertically moving platform. Some nenuphars will need to be activated by hitting green bulbs. The first Skull Coin can be retrieved by sliding down the left side of the moving platform, then quickly wall jumping to safely land on a vertically moving nenuphar; the Skull Coin is hidden behind some foreground leaves. The second Skull Coin can be acquired by performing a crush attack on a flower bumper, then carefully using the moving nenuphars to avoid the Darktoons. As the heroes break through a barricade, the third Skull Coin can be acquired by performing a crush attack on a flower bumper, then performing wall jumps to reach it; the exit can be found below.
-
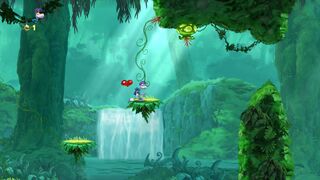 Nenuphars are key for advancing.
 -
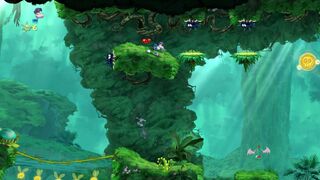 The second Skull Coin of the level.


Relic 1

The first relic can be found in this area, camouflaged in the foreground of a platform.
Area 2

The heroes will need to use more nenuphars to proceed. The fourth Skull Coin can be collected by using a flower bumper, then performing a wall jump to reach the Skull Coin, located above some spiky flowers. The exit can be found nearby.
Area 3
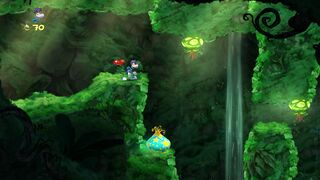
If the heroes perform a crush attack on the first flower bumper in this area and then perform wall jumps, they will be able to reach the first secret area. Afterwards, the heroes can drop down, where they will need to perform wall jumps and use a caterpillar to proceed. The heroes will need to carefully time their jumps to pass the vertically moving platforms. Tentacle claw-infested water will need to be avoided when jumping between nenuphars. As the heroes encounter a larger body of water with a horizontally moving nenuphar, they can perform wall jumps to reach the fifth Skull Coin in an area above. The exit can be found to the right of two Bulb-o-Lums.
-
-
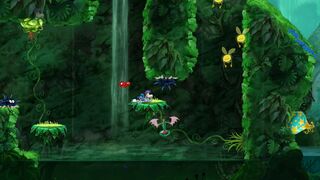 Spiky Darktoons.


Secret area 1

The heroes will need to defeat the Lividstones in this area. Once all of them have been defeated, the Electoon cage can be broken.
Area 4
After the heroes pass some Lividstones, they can collect the sixth Skull Coin of the level. If they perform a crush attack on the flower bumper, they can perform a wall jump, then glide to reach the Skull Coin. As they proceed, the heroes can use a champibumper, which will launch them into the background; they can then use another champibumper to be launched back to the foreground, where the exit can be found.
-
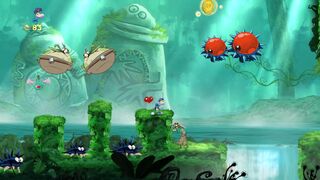 The sixth Skull Coin of the level, in the fourth area.
 -
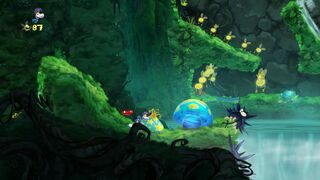 This champibumper can be used to jump to the background.
 -
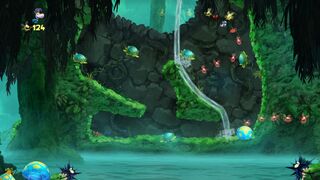 The team needs to get to a different champibumper to return to the foreground and reach the exit.


Relic 2

The second relic can be found near the beginning of this area; it is located near the statue's eye.
Relic 3

The third relic can be found in this area; it is located in the background where the heroes are launched by the champibumper.
Area 5
Near the beginning of this area, the heroes can use two flower bumpers, then perform a wall jump to reach a Swingman; if they jump to the left from the Swingman, they can perform wall jumps to reach the second secret area. Afterwards, the heroes will need to use more Swingmen to reach the exit.
-
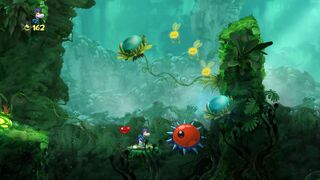 The fifth area of the level.
 -
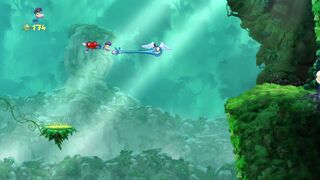 A Swingman can help the players reach the exit.


Secret area 2
In this secret area, the heroes must jump onto mosquitoes to reach the cage. They will need to avoid live missiles, then shoot projectiles at two Lividstones and a hunter to defeat them. Once the three enemies have been defeated, the heroes can disband their mosquitoes and break the cage.
-
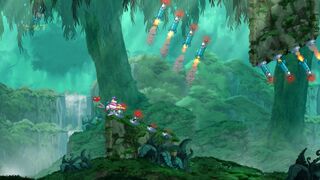 The heroes will need to use the mosquitoes in this secret area.
 -
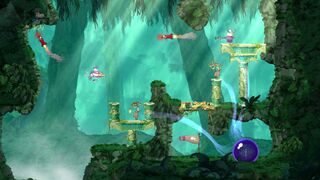 Projectiles will need to be fired at the Hunter and two Lividstones.


Area 6

The heroes will need to defeat two Lividstones in this area. Once they have been defeated, the Electoon cage can be broken, ending the level. The heroes will then pose on the photoboard as the Magician waits for the amount of Lums that were collected throughout the level.
Names in other languages
| Language | Name |
|---|---|
| English | Up And Down |
| Czech | Nahoru a dolů |
| Dutch | Op en neer |
| French | Des hauts et des bas |
| German | Auf und nieder |
| Hungarian | Fent és lent |
| Italian | Su e giù |
| Japanese | あがって さがって |
| Polish | W górę i w dół |
| Portuguese | Para cima e para baixo |
| Russian | Вверх-вниз |
| Spanish | Arriba y abajo |
External links
- Up And Down playthrough at YouTube (PC version) (Normal walkthrough + Lums Medal)
- Up And Down playthrough at YouTube (PC version) (Speed Trophy)