Mecha No Mistake!: Difference between revisions
The Jonster (talk | contribs) video links updated |
Hunchman801 (talk | contribs) Names in other languages |
||
| Line 1: | Line 1: | ||
'''Mecha No Mistake!''' is the third level of the [[Moody Clouds]], a world in ''[[Rayman Origins]]''. In this level, the heroes progress through large machinery structures. The PlayStation Vita version of ''[[Rayman Origins]]'' features a [[Ghost Mode]] of this level. This is the third level from this world and the thirty-eighth overall to be included in the [[Back to Origins]] mode in ''[[Rayman Legends]]''. | |||
==Original version== | |||
{{ROLevel | {{ROLevel | ||
| name = Mecha No Mistake! | | name = Mecha No Mistake! | ||
| Line 5: | Line 8: | ||
| followed by = [[The Reveal]] | | followed by = [[The Reveal]] | ||
| world = [[Moody Clouds]] | | world = [[Moody Clouds]] | ||
| medallion slot 1 = | | medallion slot 1 = Cage | ||
| medallion slot 2 = | | medallion slot 2 = Cage | ||
| medallion slot 3 = | | medallion slot 3 = Cage | ||
| medallion slot 4 = | | medallion slot 4 = Lums | ||
| medallion slot 5 = | | medallion slot 4 number = 150 | ||
| medallion slot 6 = | | medallion slot 5 = Lums | ||
| medal = | | medallion slot 5 number = 300 | ||
| cup = | | medallion slot 6 = Time | ||
| | | medallion slot 6 number = 2:35 | ||
| | | medal = 350 | ||
| cup = 2:10 | |||
| skull coins = 6 | |||
| relics = 3 | |||
| format numbers = true | |||
}} | }} | ||
===Area 1=== | |||
From the start, the heroes encounter [[Robot (Moody Clouds)|robots]] and metal crushers. The first [[Skull Coin]] can be found by going to the right of the first horizontal metal crusher, to cable sheaths that will release the [[Skull Coin|coin]] in a [[bubble]]. The exit is at the bottom. | |||
= | |||
==Area 1== | |||
From the start, | |||
<gallery widths="320px" heights="180px"> | <gallery widths="320px" heights="180px"> | ||
| Line 27: | Line 31: | ||
</gallery> | </gallery> | ||
==Area 2== | ===Area 2=== | ||
The team must perform | The team must perform [[wall run]]s to pass more metal crushers and [[buzzsaw]]s. The first secret area is located on the left at the top. The second [[Skull Coin]] can be collected by touching more cable sheaths that will release the [[Skull Coin|coin]] in a [[bubble]]. The exit can be found by performing another [[wall run]]. | ||
<gallery widths="320px" heights="180px"> | <gallery widths="320px" heights="180px"> | ||
| Line 35: | Line 39: | ||
</gallery> | </gallery> | ||
===Secret area 1=== | ====Secret area 1==== | ||
To | To defeat the [[Robot (Moody Clouds)|robots]] below, an [[explosive bulb]] can be hit to cause a gear to roll around and crush the [[Robot (Moody Clouds)|robots]]. The [[cage]] can then be reached and broken open. | ||
<gallery widths="320px" heights="180px"> | <gallery widths="320px" heights="180px"> | ||
Mecha No Mistake! 3.jpg|The first secret area. | Mecha No Mistake! 3.jpg|The first secret area. | ||
Mecha No Mistake! 4.jpg|Once the [[explosive bulb]] has been hit and the [[Robot (Moody Clouds)|robots]] have been | Mecha No Mistake! 4.jpg|Once the [[explosive bulb]] has been hit and the [[Robot (Moody Clouds)|robots]] have been defeated, the [[cage]] can be broken. | ||
</gallery> | </gallery> | ||
==Area 3== | ===Area 3=== | ||
During the first part of the area, the team must avoid the many moving [[ | During the first part of the area, the team must avoid the many moving [[buzzsaw]]s. If the heroes perform a [[wall run]] on two thin pipes, the third [[Skull Coin]] can be found. The second secret area is directly below a nearby platform, to the left of a large rotating gear. The exit is across the gears. | ||
<gallery widths="320px" heights="180px"> | <gallery widths="320px" heights="180px"> | ||
Sciedémentesection3.jpg|The third area of the level. | Sciedémentesection3.jpg|The third area of the level. | ||
Mecha No Mistake! 5.jpg|Moving [[ | Mecha No Mistake! 5.jpg|Moving [[buzzsaw]]s. | ||
Mecha No Mistake! 6.jpg|More moving [[ | Mecha No Mistake! 6.jpg|More moving [[buzzsaw]]s. | ||
</gallery> | </gallery> | ||
===Secret area 2=== | ====Secret area 2==== | ||
The team can defeat the [[Robot (Moody Clouds)|robots]] by simply hitting them, as they will fall | The team can defeat the [[Robot (Moody Clouds)|robots]] by simply hitting them, as they will fall onto a gear that leads to two [[buzzsaw]]s. Once this is completed, the [[cage]] can be broken open. | ||
<gallery widths="320px" heights="180px"> | <gallery widths="320px" heights="180px"> | ||
Mecha No Mistake! 7.jpg|The second secret area. | Mecha No Mistake! 7.jpg|The second secret area. | ||
Mecha No Mistake! 8.jpg|[[Robot (Moody Clouds)|Robots]] are scattered in the area. | Mecha No Mistake! 8.jpg|[[Robot (Moody Clouds)|Robots]] are scattered in the area. | ||
Mecha No Mistake! 9.jpg|When all are | Mecha No Mistake! 9.jpg|When all are defeated, the [[cage]] can be broken. | ||
</gallery> | </gallery> | ||
==Area 4== | ===Area 4=== | ||
In this area, the | In this area, the heroes must be quick when jumping from platform to platform. The exit is at the end. | ||
<gallery widths="320px" heights="180px"> | <gallery widths="320px" heights="180px"> | ||
Sciedémentesection4.jpg|The fourth area of the level. | Sciedémentesection4.jpg|The fourth area of the level. | ||
Mecha No Mistake! 10.jpg| | Mecha No Mistake! 10.jpg|Platforms that retract after a short amount of time. | ||
</gallery> | </gallery> | ||
==Area 5== | ===Area 5=== | ||
[[File:Mecha No Mistake! 11.jpg | [[File:Mecha No Mistake! 11.jpg|thumb|320px|The fifth area.]] | ||
The team now | |||
The team must now cross the body of fire by jumping from gear to gear. The fourth [[Skull Coin]] can be found by dropping down from the first gear to a platform with two [[Robot (Moody Clouds)|robots]]. The fifth [[Skull Coin]] is located above the exit. | |||
{{Clear}} | {{Clear}} | ||
==Area 6== | ===Area 6=== | ||
Like the fourth area, the heroes must quickly jump from platform to platform. This area is | Like in the fourth area, the heroes must quickly jump from platform to platform. This area is more difficult due to the presence of more [[buzzsaw]]s and metal crushers. The sixth [[Skull Coin]] can be acquired by punching a [[bulb]] that will release the [[Skull Coin|coin]] in a [[bubble]]. The exit is at the end. | ||
<gallery widths="320px" heights="180px"> | <gallery widths="320px" heights="180px"> | ||
Sciedémentesection6.jpg|The sixth area of the level. | Sciedémentesection6.jpg|The sixth area of the level. | ||
Mecha No Mistake! 12.jpg|Moving [[ | Mecha No Mistake! 12.jpg|Moving [[buzzsaw]]s. | ||
Mecha No Mistake! 13.jpg|Rotating [[ | Mecha No Mistake! 13.jpg|Rotating [[buzzsaw]]s. | ||
</gallery> | </gallery> | ||
==Area 7== | ===Area 7=== | ||
In this final area, the team must time | In this final area, the team must time their movements, as the pipes rotate at regular intervals. Once all [[Robot (Moody Clouds)|robots]] have been defeated, the [[Electoon]] [[cage]] can be broken to end the level. The heroes then will pose on the [[The Photographer|photoboard]] as [[the Magician]] counts the total number of [[Lum (UbiArt games)|Lums]] collected in the level. | ||
<gallery widths="320px" heights="180px"> | <gallery widths="320px" heights="180px"> | ||
| Line 92: | Line 97: | ||
</gallery> | </gallery> | ||
==Back to Origins== | |||
{{RLLevel | {{RLLevel | ||
| name = Mecha No Mistake! | | name = Mecha No Mistake! | ||
| difficulty = | | difficulty = 3 | ||
| image = [[File:Mecha No Mistake! - Back to Origins.png|center|320px|Mecha No Mistake!]] | | image = [[File:Mecha No Mistake! - Back to Origins.png|center|320px|Mecha No Mistake!]] | ||
| preceded by = [[On Top of Old Smokey#Back to Origins|On Top of Old Smokey]] | | preceded by = [[On Top of Old Smokey#Back to Origins|On Top of Old Smokey]] | ||
| followed by = [[Shoot for the Stars#Back to Origins|Shoot for the Stars]] | | followed by = [[Shoot for the Stars#Back to Origins|Shoot for the Stars]] | ||
| world = [[Mystical Pique]] | | world = [[Mystical Pique]] | ||
| teensies = | | teensies = 10 | ||
| bronze cup = | | bronze cup = 150 | ||
| silver cup = | | silver cup = 300 | ||
| lucky ticket = | | lucky ticket = 450 | ||
| gold cup = | | gold cup = 600 | ||
| format numbers = true | |||
}} | }} | ||
This level is playable in the [[Back to Origins]] mode in ''[[Rayman Legends]]''. There are no notable differences between the versions apart from elements from ''[[Rayman Legends]]'' replacing some from the original game. | |||
<gallery widths="320px" heights="180px"> | <gallery widths="320px" heights="180px"> | ||
Mecha No Mistake! - Back to Origins 1.jpg|The start of the level. | Mecha No Mistake! - Back to Origins 1.jpg|The start of the level. | ||
Mecha No Mistake! - Back to Origins 2.jpg|The machinery in this area will | Mecha No Mistake! - Back to Origins 2.jpg|The machinery in this area will crush the heroes if they are not careful. | ||
Mecha No Mistake! - Back to Origins 3.jpg|The first secret area. | Mecha No Mistake! - Back to Origins 3.jpg|The first secret area. | ||
Mecha No Mistake! - Back to Origins 4.jpg|A [[Lum (UbiArt games)|Lum]] chain. | Mecha No Mistake! - Back to Origins 4.jpg|A [[Lum (UbiArt games)|Lum]] chain. | ||
Mecha No Mistake! - Back to Origins 5.jpg|A [[Teensie]] [[cage]]. | Mecha No Mistake! - Back to Origins 5.jpg|A [[Teensie]] [[cage]]. | ||
Mecha No Mistake! - Back to Origins 6.jpg|The second secret area. | Mecha No Mistake! - Back to Origins 6.jpg|The second secret area. | ||
Mecha No Mistake! - Back to Origins 7.jpg|The [[cage]] in the second secret area. | Mecha No Mistake! - Back to Origins 7.jpg|The [[cage]] in the second secret area. | ||
Mecha No Mistake! - Back to Origins 8.jpg|A purple [[Lum (UbiArt games)|Lum]] chain. | Mecha No Mistake! - Back to Origins 8.jpg|A purple [[Lum (UbiArt games)|Lum]] chain. | ||
Mecha No Mistake! - Back to Origins 9.jpg| | Mecha No Mistake! - Back to Origins 9.jpg|The beginning of the fifth part. | ||
Mecha No Mistake! - Back to Origins 10.jpg|[[Rayman]] jumping on retracting platforms. | |||
Mecha No Mistake! - Back to Origins 10.jpg|[[Rayman]] jumping on | Mecha No Mistake! - Back to Origins 11.jpg|[[Rayman]] running inside a wheel while collecting [[Lum (UbiArt games)|Lums]]. | ||
Mecha No Mistake! - Back to Origins 11.jpg|[[Rayman]] running | |||
Mecha No Mistake! - Back to Origins 12.jpg|The final area, now with an added [[Teensie]] [[cage]]. | Mecha No Mistake! - Back to Origins 12.jpg|The final area, now with an added [[Teensie]] [[cage]]. | ||
</gallery> | </gallery> | ||
==Names in other languages== | |||
{{Names | |||
|en=Mecha No Mistake! | |||
|zh_hans=机器人没有错 | |||
|cs=Já nic, já muzikant! | |||
|da=Få styr på mekanikken! | |||
|nl=Robotsing | |||
|fi=Ei virheitä! | |||
|fr=Des scies démentes | |||
|de=Moderne Zeiten | |||
|hu=Mecha-mánia | |||
|it=Melanzana meccanica | |||
|ja=きかいに まちがいは ない! | |||
|ja_S=''[[Rayman Origins]]'' | |||
|ja_2=「ぼうそう暴走するき機かい械」 | |||
|ja_2_S=''[[Rayman Legends]]'' | |||
|no=Ikke gjør noen feil! | |||
|pl=Roboty nie popełniają błędów! | |||
|pt=VI também | |||
|pt_S=''[[Rayman Origins]]'' | |||
|pt_2=Maquinaria pesada | |||
|pt_2_S=''[[Rayman Legends]]'' | |||
|ru=Вот так машина! | |||
|es=Maquinaria pesada | |||
|sv=En dag på jobbet | |||
}} | |||
==External links== | ==External links== | ||
| Line 139: | Line 169: | ||
[[Category:Places from Rayman Origins]] | [[Category:Places from Rayman Origins]] | ||
[[Category:Places from Rayman Legends]] | |||
Revision as of 17:18, 8 September 2024
Mecha No Mistake! is the third level of the Moody Clouds, a world in Rayman Origins. In this level, the heroes progress through large machinery structures. The PlayStation Vita version of Rayman Origins features a Ghost Mode of this level. This is the third level from this world and the thirty-eighth overall to be included in the Back to Origins mode in Rayman Legends.
Original version
| Mecha No Mistake! | |||||
|---|---|---|---|---|---|
 | |||||
| ← On Top of Old Smokey | The Reveal → | ||||
 Moody Clouds Moody Clouds
| |||||
   
|

|

| |||
   
|
|
  
| |||

|

| ||||

|

| ||||

Area 1
From the start, the heroes encounter robots and metal crushers. The first Skull Coin can be found by going to the right of the first horizontal metal crusher, to cable sheaths that will release the coin in a bubble. The exit is at the bottom.
-
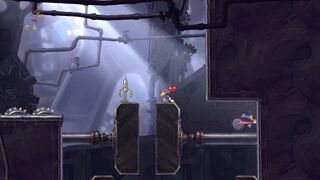 The first area of the level.

Area 2
The team must perform wall runs to pass more metal crushers and buzzsaws. The first secret area is located on the left at the top. The second Skull Coin can be collected by touching more cable sheaths that will release the coin in a bubble. The exit can be found by performing another wall run.
-
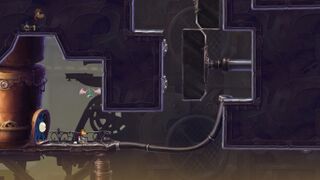 The second area.
 -
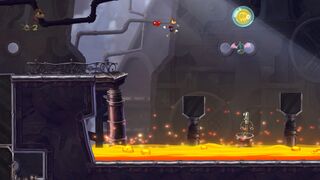 The second Skull Coin in the level.


Secret area 1
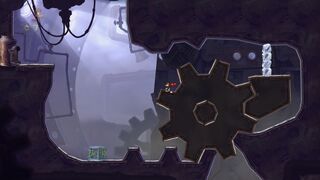
To defeat the robots below, an explosive bulb can be hit to cause a gear to roll around and crush the robots. The cage can then be reached and broken open.
-
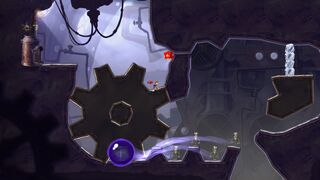 The first secret area.
 -


Area 3
During the first part of the area, the team must avoid the many moving buzzsaws. If the heroes perform a wall run on two thin pipes, the third Skull Coin can be found. The second secret area is directly below a nearby platform, to the left of a large rotating gear. The exit is across the gears.


Secret area 2
The team can defeat the robots by simply hitting them, as they will fall onto a gear that leads to two buzzsaws. Once this is completed, the cage can be broken open.
-
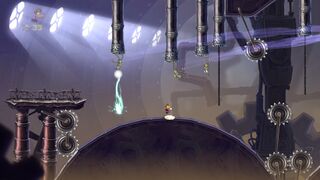 The second secret area.
 -
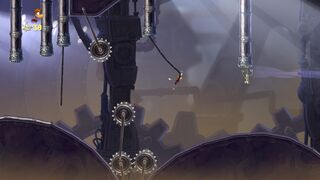 Robots are scattered in the area.
 -
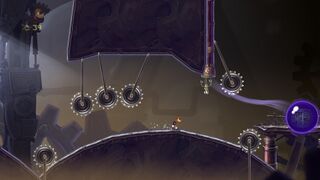 When all are defeated, the cage can be broken.


Area 4
In this area, the heroes must be quick when jumping from platform to platform. The exit is at the end.
-
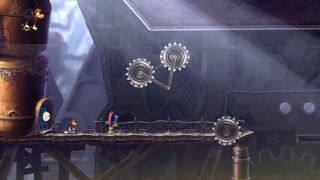 The fourth area of the level.
 -
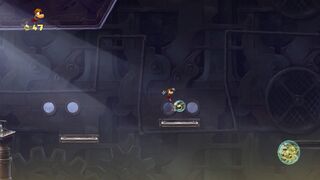 Platforms that retract after a short amount of time.


Area 5

The team must now cross the body of fire by jumping from gear to gear. The fourth Skull Coin can be found by dropping down from the first gear to a platform with two robots. The fifth Skull Coin is located above the exit.
Area 6
Like in the fourth area, the heroes must quickly jump from platform to platform. This area is more difficult due to the presence of more buzzsaws and metal crushers. The sixth Skull Coin can be acquired by punching a bulb that will release the coin in a bubble. The exit is at the end.


Area 7
In this final area, the team must time their movements, as the pipes rotate at regular intervals. Once all robots have been defeated, the Electoon cage can be broken to end the level. The heroes then will pose on the photoboard as the Magician counts the total number of Lums collected in the level.
-
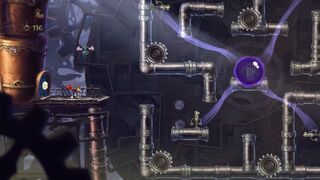 The seventh and final area.
 -
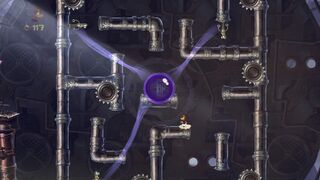 The robots are on the rotating pipes.


Back to Origins
| Mecha No Mistake! | ||||||||
|---|---|---|---|---|---|---|---|---|
 | ||||||||

| ||||||||
| ← On Top of Old Smokey | Shoot for the Stars → | |||||||
| Mystical Pique
| ||||||||

|
||||||||

|

| |||||||

|

| |||||||
This level is playable in the Back to Origins mode in Rayman Legends. There are no notable differences between the versions apart from elements from Rayman Legends replacing some from the original game.
-
 The start of the level.
 -
 The machinery in this area will crush the heroes if they are not careful.
 -
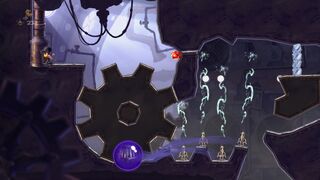 The first secret area.
 -
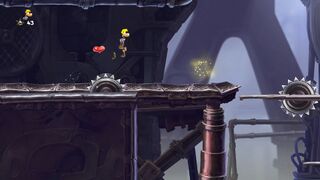 A Lum chain.
 -

-
 The second secret area.
 -
 The cage in the second secret area.
 -
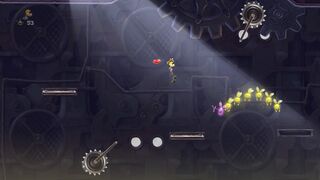 A purple Lum chain.
 -
 The beginning of the fifth part.
 -
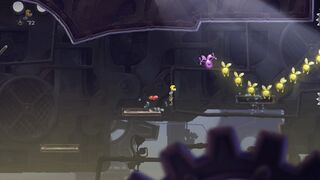 Rayman jumping on retracting platforms.
 -

-


Names in other languages
| Language | Name |
|---|---|
| English | Mecha No Mistake! |
| Chinese (simplified) | 机器人没有错 |
| Czech | Já nic, já muzikant! |
| Danish | Få styr på mekanikken! |
| Dutch | Robotsing |
| Finnish | Ei virheitä! |
| French | Des scies démentes |
| German | Moderne Zeiten |
| Hungarian | Mecha-mánia |
| Italian | Melanzana meccanica |
| Japanese | きかいに まちがいは ない! (Rayman Origins)
「ぼうそう暴走するき機かい械」 (Rayman Legends) |
| Norwegian | Ikke gjør noen feil! |
| Polish | Roboty nie popełniają błędów! |
| Portuguese | VI também (Rayman Origins)
Maquinaria pesada (Rayman Legends) |
| Russian | Вот так машина! |
| Spanish | Maquinaria pesada |
| Swedish | En dag på jobbet |
External links
- Mecha No Mistake! playthrough at YouTube (PC version) (Normal walkthrough + Lums Medal)
- Mecha No Mistake! playthrough at YouTube (PC version) (Speed Trophy)
- Mecha No Mistake!'s Rayman Legends playthrough at YouTube (PC version)