Mystical Munkeys: Difference between revisions
Hunchman801 (talk | contribs) m →[[Back to Origins]]: Manual of style, replaced: aren't → are not |
No edit summary |
||
| Line 22: | Line 22: | ||
==Original version== | ==Original version== | ||
==Area 1== | ==Area 1== | ||
The | The heroes will need to use the power to [[Wall run|run on walls]] in order to progress, as they avoid the pits and spikes. The first [[Skull Coin]] can be collected by [[Helicopter|gliding]] in between two [[Antitoon|Darktoons]] attached to a wall. The second [[Skull Coin]] can be found by [[Wall run|running up on the wall]] which is located to the left of the exit. | ||
<gallery widths="320px" heights="180px"> | <gallery widths="320px" heights="180px"> | ||
Mystical Munkeys 1.jpg|The clothesline acts like a zip-line. | Mystical Munkeys 1.jpg|The clothesline acts like a zip-line. | ||
Mystical Munkeys 2.jpg|The [[Fakir]]s long beard can be | Mystical Munkeys 2.jpg|The [[Fakir]]s long beard can be used as a vine to help get across. | ||
</gallery> | </gallery> | ||
===[[Relic]] 1=== | |||
[[File:Mystical Munkeys first relic.png|thumb|right|320px|The first [[relic]] can be found to the right of [[Rayman]].]] | |||
The first [[relic]] can be found in this area; it is located to the right of the second [[fakir]] that the heroes will encounter, embedded in a hole in the wall. | |||
{{clear}} | |||
==Area 2== | ==Area 2== | ||
[[File:Mystical Munkeys 3.jpg|320px|thumb| | [[File:Mystical Munkeys 3.jpg|320px|thumb|left|The [[stone man]] returns as an enemy.]] | ||
The heroes arrive at a snowy environment filled with icy platforms and chasms. Once they ascend, they will encounter an enemy that is familiar to [[Rayman]]; the [[stone man]], who has not been seen since [[Rayman 1|the original ''Rayman'' game]]. He acts similar to how he did in [[Rayman 1|the original game]]; he throws [[lava rock]]s at the players. Once the [[stone man]] has been defeated, the heroes can proceed. The third [[Skull Coin]] is located to the left in the middle of two ropes. The first secret area can be found right underneath the third rope. The heroes can then proceed to the exit. | |||
{{Clear}} | {{Clear}} | ||
===Secret area 1=== | ===Secret area 1=== | ||
[[File:Mystical Munkeys 4.jpg|320px|thumb| | [[File:Mystical Munkeys 4.jpg|320px|thumb|right|The first secret area of the level.]] | ||
The | The heroes can defeat the [[Livingstone|Lividstones]] in two ways. One way is to defeat them manually, while the other is by breaking the ice blocks, making the large platform collapse and crush the [[Livingstone|Lividstones]]. Once they have all been defeated, the [[Electoon]] [[cage]] can be broken. | ||
{{Clear}} | {{Clear}} | ||
==Area 3== | ==Area 3== | ||
The heroes enter the cave again, where the meditating [[Fakir]]s will be needed to help them pass the dangerous spikes. The fourth [[Skull Coin]] can be found hiding behind some kind of clothing. The heroes face many [[Antitoon|Darktoons]] as they progress. The fifth [[Skull Coin]] is located between two biting [[Antitoon|Darktoons]]. | |||
<gallery widths="320px" heights="180px"> | <gallery widths="320px" heights="180px"> | ||
| Line 48: | Line 54: | ||
Mystical Munkeys 6.jpg|The fifth [[Skull Coin]] of the level. | Mystical Munkeys 6.jpg|The fifth [[Skull Coin]] of the level. | ||
</gallery> | </gallery> | ||
===[[Relic]] 2=== | |||
[[File:Mystical Munkeys second relic.png|thumb|right|320px|The second [[relic]] can be found to the left of [[Rayman]]'s feet.]] | |||
The second [[relic]] can be found in this area near a [[swingman]] and a [[fakir]] with a long beard. | |||
{{clear}} | |||
==Area 4== | ==Area 4== | ||
[[File:Mystical Munkeys 7.jpg|320px|thumb| | [[File:Mystical Munkeys 7.jpg|320px|thumb|left|The [[Stone man|stone men]] throw [[lava rock]]s that can now bounce off the walls.]] | ||
Arriving back to a snowy environment, the heroes will need to counter against [[lava rock]]s being thrown by the [[stone man]]. The [[lava rock]]s can be attacked or avoided as the heroes defeat the [[stone man]]. As the heroes proceed, they will need to defeat another [[stone man]], then they can proceed to the exit. | |||
{{Clear}} | {{Clear}} | ||
==Area 5== | ==Area 5== | ||
[[File:Mystical Munkeys 8.jpg|320px|thumb| | [[File:Mystical Munkeys 8.jpg|320px|thumb|right|A meditating [[Fakir]].]] | ||
Once again into the cave, more [[Antitoon|Darktoons]] appear, as well as [[Darkroot]]s. Using the [[wall run]] ability will come in handy to advance. After a while, the second secret area can be found by dropping down next to a small [[Darkroot]]. Once completed, the heroes can go to the nearby exit. | Once again into the cave, more [[Antitoon|Darktoons]] appear, as well as [[Darkroot]]s. Using the [[wall run]] ability will come in handy to advance. After a while, the second secret area can be found by dropping down next to a small [[Darkroot]]. Once completed, the heroes can go to the nearby exit. | ||
{{Clear}} | {{Clear}} | ||
===[[Relic]] 3=== | |||
[[File:Mystical Munkeys third relic.png|thumb|left|320px|The third [[relic]] can be found directly above [[Rayman]].]] | |||
The third [[relic]] can be found just as the heroes enter this area; it is located on a flag in the background. | |||
{{clear}} | |||
===Secret area 2=== | ===Secret area 2=== | ||
[[File:Mystical Munkeys 9.jpg|320px|thumb|right|The second secret area, with loop-d-loops.]] | [[File:Mystical Munkeys 9.jpg|320px|thumb|right|The second secret area, with loop-d-loops.]] | ||
The | The heroes will need to [[Running|run]] on the loop-d-loop in order to reach the [[Stone man|stone men]] in the area. A couple of them are even standing on the walls. Once all of them have been defeated, the [[cage]] can be broken. | ||
{{Clear}} | {{Clear}} | ||
| Line 69: | Line 87: | ||
==Area 6== | ==Area 6== | ||
[[File:Mystical Munkeys 10.jpg|320px|thumb|left|The sixth area.]] | [[File:Mystical Munkeys 10.jpg|320px|thumb|left|The sixth area.]] | ||
In the snowy environment, two [[switch]]es attached to | In the snowy environment, two [[switch]]es attached to an elevator need to be used in order to lift it. The [[switch]]es will need to be used alternatively, as [[Darkroot]]s will appear on both sides. Once the elevator arives at the top, the exit can be found to the right. | ||
{{Clear}} | {{Clear}} | ||
==Area 7== | ==Area 7== | ||
The heroes remain in the snowy area, where the process will be similar the previous area, except it will be more difficult. The sixth [[Skull Coin]] can be collected by hitting the switch, making the elevator raise to a higher altitude than the [[Skull Coin|coin]]'s position, then dropping down to the right to collect it. Once the elevator reaches the top, the exit can be found to the right. | |||
<gallery widths="320px" heights="180px"> | <gallery widths="320px" heights="180px"> | ||
| Line 83: | Line 101: | ||
==Area 8== | ==Area 8== | ||
[[File:Mystical Munkeys 13.jpg|320px|thumb|right|The eighth and final area of the level.]] | [[File:Mystical Munkeys 13.jpg|320px|thumb|right|The eighth and final area of the level.]] | ||
All the | All the heroes will need to do is defeat the three [[Stone man|stone men]]. Once they have been defeated, the [[Electoon]] [[cage]] can be broken, ending the level. The heroes will then pose on the [[The Photographer|photoboard]] as [[the Magician]] waits for the total amount of [[Lum (UbiArt games)|Lums]] that have been collected throughout the level. | ||
{{Clear}} | {{Clear}} | ||
Revision as of 02:04, 18 September 2019
| Mystical Munkeys | |||||||||||
|---|---|---|---|---|---|---|---|---|---|---|---|
 | |||||||||||
| ← Moseying the Mountain | Way of the Electoons → | ||||||||||
 Mystical Pique Mystical Pique
| |||||||||||
   
|

|

| |||||||||
   
|
|
  
| |||||||||

|

| ||||||||||

Mystical Munkeys is the second level of the Mystical Pique, the fifth world in Rayman Origins. During the level, the heroes will alternate between the strange cave like area and the snowy mountains. This is the first level from this world and thirty-third overall that's included in the Back to Origins mode in Rayman Legends.
Original version
Area 1
The heroes will need to use the power to run on walls in order to progress, as they avoid the pits and spikes. The first Skull Coin can be collected by gliding in between two Darktoons attached to a wall. The second Skull Coin can be found by running up on the wall which is located to the left of the exit.
-
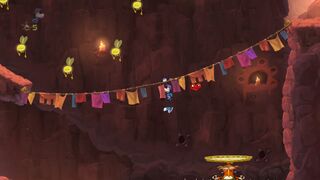 The clothesline acts like a zip-line.
 -
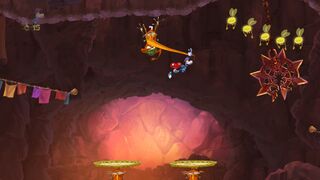 The Fakirs long beard can be used as a vine to help get across.


Relic 1

The first relic can be found in this area; it is located to the right of the second fakir that the heroes will encounter, embedded in a hole in the wall.
Area 2

The heroes arrive at a snowy environment filled with icy platforms and chasms. Once they ascend, they will encounter an enemy that is familiar to Rayman; the stone man, who has not been seen since the original Rayman game. He acts similar to how he did in the original game; he throws lava rocks at the players. Once the stone man has been defeated, the heroes can proceed. The third Skull Coin is located to the left in the middle of two ropes. The first secret area can be found right underneath the third rope. The heroes can then proceed to the exit.
Secret area 1

The heroes can defeat the Lividstones in two ways. One way is to defeat them manually, while the other is by breaking the ice blocks, making the large platform collapse and crush the Lividstones. Once they have all been defeated, the Electoon cage can be broken.
Area 3
The heroes enter the cave again, where the meditating Fakirs will be needed to help them pass the dangerous spikes. The fourth Skull Coin can be found hiding behind some kind of clothing. The heroes face many Darktoons as they progress. The fifth Skull Coin is located between two biting Darktoons.
-
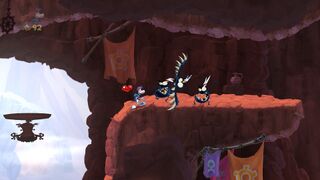 A small group of Darktoons.
 -
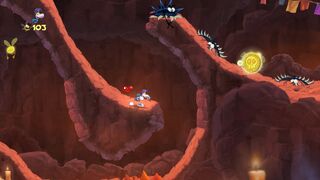 The fifth Skull Coin of the level.


Relic 2

The second relic can be found in this area near a swingman and a fakir with a long beard.
Area 4

Arriving back to a snowy environment, the heroes will need to counter against lava rocks being thrown by the stone man. The lava rocks can be attacked or avoided as the heroes defeat the stone man. As the heroes proceed, they will need to defeat another stone man, then they can proceed to the exit.
Area 5

Once again into the cave, more Darktoons appear, as well as Darkroots. Using the wall run ability will come in handy to advance. After a while, the second secret area can be found by dropping down next to a small Darkroot. Once completed, the heroes can go to the nearby exit.
Relic 3

The third relic can be found just as the heroes enter this area; it is located on a flag in the background.
Secret area 2

The heroes will need to run on the loop-d-loop in order to reach the stone men in the area. A couple of them are even standing on the walls. Once all of them have been defeated, the cage can be broken.
Area 6

In the snowy environment, two switches attached to an elevator need to be used in order to lift it. The switches will need to be used alternatively, as Darkroots will appear on both sides. Once the elevator arives at the top, the exit can be found to the right.
Area 7
The heroes remain in the snowy area, where the process will be similar the previous area, except it will be more difficult. The sixth Skull Coin can be collected by hitting the switch, making the elevator raise to a higher altitude than the coin's position, then dropping down to the right to collect it. Once the elevator reaches the top, the exit can be found to the right.
-
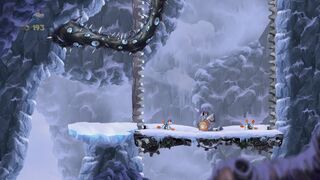 The seventh area is nearly the same as the sixth area.
 -
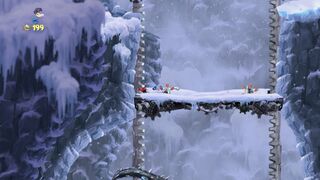 The switches will need to be repeatedly hit.


Area 8

All the heroes will need to do is defeat the three stone men. Once they have been defeated, the Electoon cage can be broken, ending the level. The heroes will then pose on the photoboard as the Magician waits for the total amount of Lums that have been collected throughout the level.
| Mystical Munkeys | ||||||||
|---|---|---|---|---|---|---|---|---|
 | ||||||||

| ||||||||
| ← Murray of the Deep | Golly G. Golem → | |||||||
| Mystical Pique
| ||||||||

|
||||||||

|

| |||||||

|

| |||||||
Back to Origins
In the Back to Origins version, there are not many differences between the original version; except of the notable elements from Rayman Legends replacing some of the elements from the game.
-
 The start of the level.
 -
 A purple Lum chain.
 -
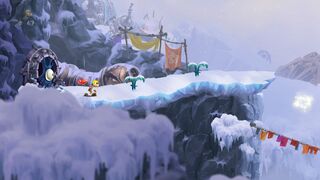 Two turnips.
 -
 A Lum cage.
 -
 Two Darktoons.
 -
 The first secret area.
 -

-
 Back in the cave again.
 -
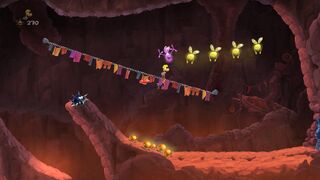 Another purple Lum chain.
 -
 Rayman is now back in the snowy environment.
 -
 Two Fakirs can be used as platforms.
 -
 The second secret area.
 -

-
 Darkroots makes it harder advancing with the elevator.
 -
 The final area.


External links
- Mystical Munkeys playthrough at YouTube (PC version) (Normal walkthrough + Lums Medal)
- Mystical Munkeys playthrough at YouTube (PC version) (Speed Trophy)