Poor Little Daisy: Difference between revisions
Hunchman801 (talk | contribs) m →[[Back to Origins]]: Manual of style, replaced: aren't → are not |
No edit summary |
||
| Line 12: | Line 12: | ||
}} | }} | ||
'''Poor Little Daisy''' is the seventh and last level of the [[Ticklish Temples]], a world in ''[[Rayman Origins]]''. This level consists of a boss battle against [[Carnivora]], the first of the [[four Kings]] | '''Poor Little Daisy''' is the seventh and last level of the [[Ticklish Temples]], a world in ''[[Rayman Origins]]''. This level consists of a boss battle against [[Carnivora]], the first of the [[four Kings]] which were transformed into monsters; the heroes must defeat them in order to transform them back into their original form. This is the fifth level from this world, and the eighth overall that is included in the [[Back to Origins]] painting from ''[[Rayman Legends]]''. | ||
==Original version== | ==Original version== | ||
==Area 1== | ==Area 1== | ||
The boss battle begins | The boss battle begins before too long; the heroes will need to move quickly, as [[Carnivora]] pursues them. They must quickly climb a vertical passage, using platforms like [[nenuphar]]s and [[Platformman]] to aid them. At times, [[Carnivora]] will stop climbing, roar several times, causing platforms to crumble, and then continue to climb again with more momentum. The first [[Skull Coin]] of the level can be found by going right, and through an open passage next to a vine. The second [[Skull Coin]] can be found by going left of the second [[Lum King]] near some [[Darkroot]]s. Eventually, the heroes will reach the top of the area; they must proceed to the right and continue to avoid [[Carnivora]] as she pursues them. The heroes will soon pass through a narrow passage, where [[Carnivora]] stops, as the passage is too narrow for her to fit through. | ||
<gallery widths="320px" heights="180px"> | <gallery widths="320px" heights="180px"> | ||
| Line 25: | Line 25: | ||
Poor Little Daisy 5.jpg|[[Carnivora]] will now chase the player to the right. | Poor Little Daisy 5.jpg|[[Carnivora]] will now chase the player to the right. | ||
Poor Little Daisy 6.jpg|Due to the path being to narrow, [[Carnivora]] cannot proceed to chase the player. | Poor Little Daisy 6.jpg|Due to the path being to narrow, [[Carnivora]] cannot proceed to chase the player. | ||
Poor Little Daisy 7.jpg| | Poor Little Daisy 7.jpg|He will constantly knock his head against to wall, trying to break it to get through to the other side. | ||
</gallery> | </gallery> | ||
==Area 2== | ==Area 2== | ||
In | In this area, the heroes must avoid [[Darkroot]]s for briefly, before falling into a room below where [[Carnivora]] resides; this is where the actual battle takes place. [[Carnivora]] will walk forward, and the heroes must [[Wall run|run up the walls]] in order to avoid her. [[Carnivora]] will then hit her head against the wall, causing a [[bubo]] to appear. Once the heroes hit this [[bubo]], [[Carnivora]] will become stunned, and then walk on the ceiling, proceeding to hit her head against the floor. She will do this several times, as the heroes proceed to run beneath [[Carnivora]] in between their attacks. After hitting the floor several times, [[Carnivora]] will release her grip on the ceiling, laying there on her head while a [[bubo]] forms on her underside. After hitting this [[bubo]], [[Carnivora]] will flip over and jump several times, during which the heroes must [[Running|run]] underneath her. Eventually, [[Carnivora]] shoots her long tongue forward across the room, and a [[bubo]] appears in her mouth. The heroes must [[Running|run]] up the tongue and hit the [[bubo]] to defeat [[Carnivora]], who will then return to her normal self, ending the level. The heroes will pose on the [[The Photographer|photoboard]] as [[the Magician]] waits for the amount of [[Lum (UbiArt games)|Lums]] that were collected throughout the level. | ||
<gallery widths="320px" heights="180px"> | <gallery widths="320px" heights="180px"> | ||
Revision as of 20:40, 13 June 2020
| Poor Little Daisy | |||||||||||
|---|---|---|---|---|---|---|---|---|---|---|---|
 | |||||||||||
| ← Still Flowing | Savage Swarms → | ||||||||||
 Ticklish Temples Ticklish Temples
| |||||||||||
   
|
   
|

| |||||||||

|
|||||||||||

Poor Little Daisy is the seventh and last level of the Ticklish Temples, a world in Rayman Origins. This level consists of a boss battle against Carnivora, the first of the four Kings which were transformed into monsters; the heroes must defeat them in order to transform them back into their original form. This is the fifth level from this world, and the eighth overall that is included in the Back to Origins painting from Rayman Legends.
Original version
Area 1
The boss battle begins before too long; the heroes will need to move quickly, as Carnivora pursues them. They must quickly climb a vertical passage, using platforms like nenuphars and Platformman to aid them. At times, Carnivora will stop climbing, roar several times, causing platforms to crumble, and then continue to climb again with more momentum. The first Skull Coin of the level can be found by going right, and through an open passage next to a vine. The second Skull Coin can be found by going left of the second Lum King near some Darkroots. Eventually, the heroes will reach the top of the area; they must proceed to the right and continue to avoid Carnivora as she pursues them. The heroes will soon pass through a narrow passage, where Carnivora stops, as the passage is too narrow for her to fit through.
-
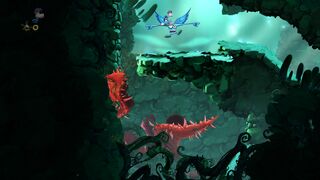 The beginning of the first chase.
 -
 The first Skull Coin.
 -
 The second Skull Coin.
 -
 Carnivora will now chase the player to the right.
 -
 Due to the path being to narrow, Carnivora cannot proceed to chase the player.
 -
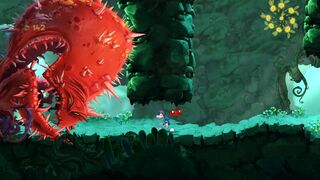 He will constantly knock his head against to wall, trying to break it to get through to the other side.


Area 2
In this area, the heroes must avoid Darkroots for briefly, before falling into a room below where Carnivora resides; this is where the actual battle takes place. Carnivora will walk forward, and the heroes must run up the walls in order to avoid her. Carnivora will then hit her head against the wall, causing a bubo to appear. Once the heroes hit this bubo, Carnivora will become stunned, and then walk on the ceiling, proceeding to hit her head against the floor. She will do this several times, as the heroes proceed to run beneath Carnivora in between their attacks. After hitting the floor several times, Carnivora will release her grip on the ceiling, laying there on her head while a bubo forms on her underside. After hitting this bubo, Carnivora will flip over and jump several times, during which the heroes must run underneath her. Eventually, Carnivora shoots her long tongue forward across the room, and a bubo appears in her mouth. The heroes must run up the tongue and hit the bubo to defeat Carnivora, who will then return to her normal self, ending the level. The heroes will pose on the photoboard as the Magician waits for the amount of Lums that were collected throughout the level.
-

-
 Rayman falls down to the room where the actual battle takes place.
 -
 During the first part, Carnivora will charge forward.
 -
 During the second part, she will climb up on the ceiling and attempt to hit the player with her head.
 -
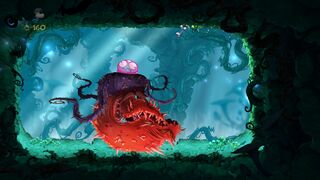 After a while, a bubo will be revealed.
 -
 During the third and final part she jumps back and forth to attempt to hit the player.
 -
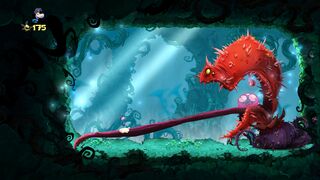 After a while she shoots out her tongue, revealing a bubo in her mouth.
 -
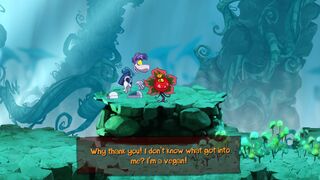 Carnivora's true form is revealed once the battle is finished.


| Poor Little Daisy | ||||||||
|---|---|---|---|---|---|---|---|---|
 | ||||||||

| ||||||||
| ← Hunter Gatherer | Best Original Score → | |||||||
| Jibberish Jungle
| ||||||||

|
||||||||
 
|

| |||||||

|

| |||||||
Back to Origins
In the Back to Origins version, there are not many differences between the original version; except of the notable elements from Rayman Legends replacing some of the elements from the game. One difference is shown after Carnivora is defeated; when he is, he won't say anything, and naturally no dialogue box will show.
-
 The start of the level.
 -

-

-
 A Skull Coin.
 -
 The second Teensie in the level.
 -
 An added turnip.
 -
 A bunch of purple Lum chains.
 -
 The fight against Carnivora begins.
 -

-
 Carnivora will eventually start moving on top of the arena.
 -


External links
- Poor Little Daisy playthrough at YouTube (PC version) (Normal walkthrough + Lums Medal)
- Poor Little Daisy's Rayman Legends playthrough at YouTube (PC version)